How to Create a Meditation Practice You’ll Actually Stick to
You know meditation is good for you. You’ve seen the studies. You know you feel better when you do it. You know all of the positives, yet, it’s still so hard to commit to a daily meditation practice. I know, I’ve been there.I’m here to share nine tools I’ve personally used, or use still daily, to create a meditation practice that sticks. I’ve been an on and off again meditator since I was in middle school but it wasn’t until I implemented a few simple practices that it became a daily routine for me. Read on to learn my favorite tips.
You know meditation is good for you. You’ve seen the studies. You know you feel better when you do it. You know all of the positives, yet, it’s still so hard to commit to a daily meditation practice. I know, I’ve been there.
I’m here to share nine tools I’ve personally used, or use still daily, to create a meditation practice that sticks. I’ve been an on and off again meditator since I was in middle school but it wasn’t until I implemented a few simple practices that it became a daily routine for me. Read on to learn my favorite tips.
Why Meditate?
Entire books are written on this topic, but here are some of the big reasons meditation will rock your world.
Stress relief: Regular meditation will help you see the bigger picture so you’re not narrowed in on the small stuff.
Better sleep: Meditation helps soothe your pineal gland, which, among other things, helps you sleep.
Improves your health: Regular meditation can help lower your blood pressure, improve your immune function, and decrease inflammation.
Improves your aura (energy field): Meditating raises your energy frequency, which will improve your aura. Meditate regularly, and you’ll start to experience a big shift in your energy frequency and aura.
Stay in tune with your soul’s purpose: Lost or confused about what to do? Meditation can help clear your mind so you can gain more clarity about the next right move.
Sounds good, right? A regular meditation practice is life-changing, but the key here is regular. Here are nine ways to build a meditation practice that you’ll actually stick to.
9 Ways to Create a Meditation Practice That Actually Sticks
1. Ritual for all five senses
Creating any habit is all about routine and repetition. One effective way to do this is to build rituals around your meditation time. By practicing the same rituals, at the same time, every day, you’ll prime yourself for your meditation practice.
The more of your five senses you can incorporate into your meditation rituals the better, it will help your new habit stick. Here are a few ways to engage your five senses and create a ritual around your meditation practice.
Sound: Music, gong, singing bowl, or a fountain
Scent: Essential oils, candles, or incense
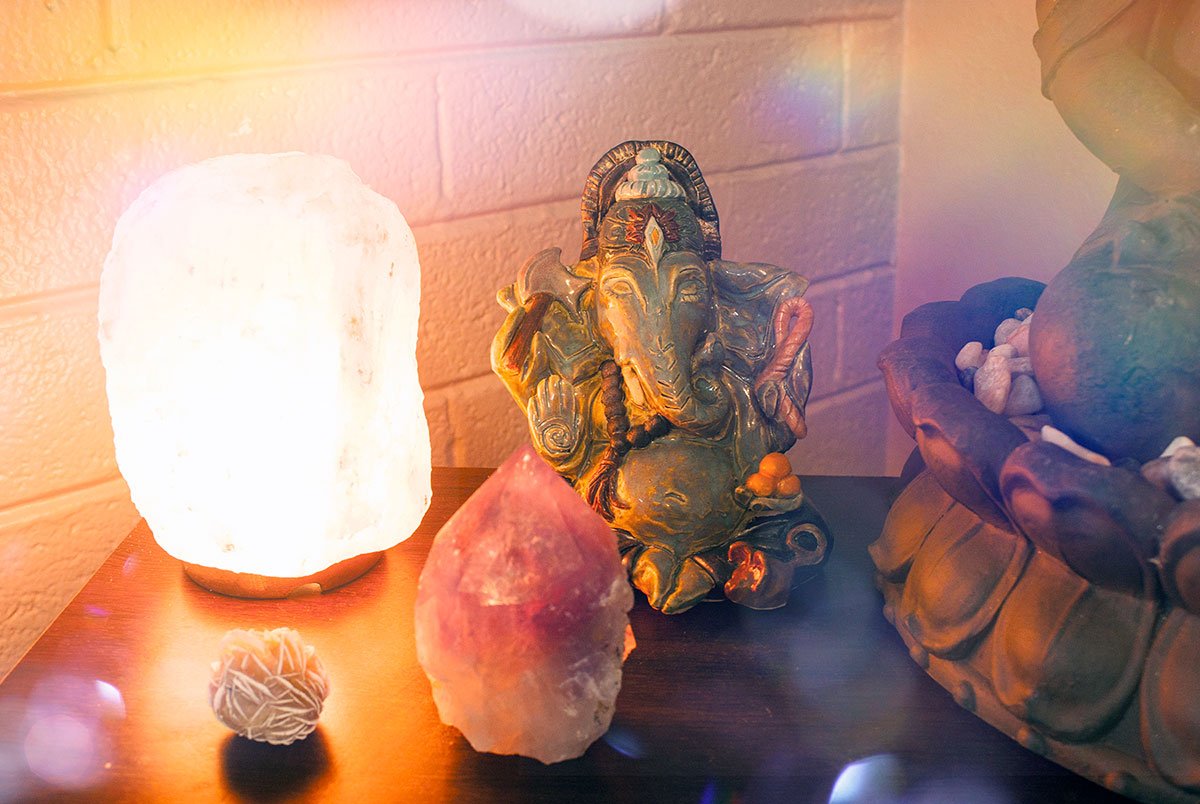
Sight: Salt lamps, candles, colored light, specific time of day, specific room
Touch: Meditation pillow or blanket, mudras, self-massage
Taste: Fresh breath right after you brush your teeth in the morning, or a specific herbal tea
Pick and choose what sounds good to you. These meditation rituals can be as elaborate or as simple as you want. The simple act of lighting a candle and rubbing a certain scent on your chest before every meditation can have a powerful effect.
2. Build in time. Something is better than nothing.
“There’s not enough time” is probably the #1 killer of most meditation practices. Like any new habit, it’s all about building in the time for it. The good news is, you don’t need much time to build a meditation practice, just 5-15 minutes a day will have a positive effect on your day.
The key, plan ahead. Take an honest look at the schedule of your day, and decide where the best place is to add in 10-15 minutes of quiet meditation time. When you’re just getting started try setting a reminder on your phone so you don’t forget.
Five minutes of meditation in your car is better than no meditation and will help solidify your meditation practice.
3. Create a space
A room, a corner of a room, or a simple seat will do. Designating a specific spot for your meditation time will help you stay on track. You know exactly where you need to go and have a spot for any meditation ritual elements you’re incorporating.
A space with minimal distractions is ideal but any dedicated space is better than no space.
4. Be OK with distractions
Distractions are part of life and will most likely make an appearance during your meditation time at some point. Whether it’s a pet, child, loved one, or a noisy work crew outside your house, expect them, accept them, and then move right back to your meditation.
5. Use a timer and start small
It can be difficult to get in the zone while you’re meditating if you’re spending the entire time wondering how long you’ve been meditating. Set a timer on your phone so you don’t have to wonder.
Starting out, set your timer for just 5 minutes and work your way up from there. Once you find that you’re naturally ready to sit for longer than 5 minutes, up your time by a couple of minutes. Do this for six months and you might be surprised by how long you can sit in quiet meditation.
6. Pranayama
If your mind goes a mile a minute the moment you sit down, try some pranayama to help you drop into your meditation. Many of us are stuck in fight or flight mode constantly and flipping the switch to relax can seem impossible. Starting your meditation with some simple breathing exercises can help set the tone for your meditation.
Try either of these breathing techniques to help queue your body to relax:
Three-part breath
As you inhale, feel the air filling the lowest part of your belly, the middle part of the torso (just below your heart center), and then your chest. As you exhale let the air out in the reverse order, feel the air leave your chest, just underneath your chest, and out your lower belly. Repeat as many times as you’d like.
Alternate nostril breathing
Using your thumb and your ring finger, close your right nostril with your thumb and inhale slowly through your left nostril. Cover your left nostril with your ring finger, release your thumb from the right nostril, and exhale. Repeat this on the other side starting with inhaling through your right nostril. Repeat as many times as you’d like.
7. Use guided meditations
If pranayama isn’t your jam, or you need some extra guidance to stay in the meditation zone try using guided meditations. There are several podcasts and free apps available with great guided meditations, you can also find several online. Here are some that I’ve used that are all great places to start:
Meditation Oasis Podcast (Free and my favorite!)
Meditation Minis Podcast (Free)
Headspace App (Free and paid options)
My guided meditations bundles for energy balancing, moon phases, Wheel of the Year, and Spirit Guides. Here you can download my free waning moon meditation.
8. Accountability Buddy or a Meditation Challenge
Using the momentum of a group or working with a meditation accountability partner can help you seal the deal for your meditation routine and keep you on track. Have a soul sister who’s trying to build a meditation practice too? Make a plan to touch base with each other every day once you’ve meditated.
9. Allow yourself cheat days
Things will come up, and you’ll probably miss some days. Instead of letting this be a reason to beat yourself up or stop meditating all together allow yourself a cheat day once a week. That way, if you have a crazy day that gets away from you (which will probably happen at some point!), you’ve got an easy out that you don’t have to feel guilty about.
Ditched your meditation practice? Start with self-love, no need to beat yourself up over it, then come on back to this list to find some motivation to get started again. Your mind, body, soul, and fellow humans will thank you for it.
The Ultimate Guide to Caring for Your Tarot & Oracle Cards
Now that you have your magical Moon Phase Ritual Cards from last week's post, I thought it would be a perfect time to give you an ultimate guide for taking care of your tarot and oracle cards!Have a growing collection of oracle and tarot cards that you’re always adding to? If you’ve got a growing collection, you probably don’t use all of those cards every day. You most likely have your favorite decks that you gravitate towards, decks you use rarely, and decks that you let other people use.Your oracle and tarot cards can pick up vibes from other people, yourself, and accumulate stagnant energy.
Now that you have your magical Moon Phase Ritual Cards from last week's post, I thought it would be a perfect time to give you an ultimate guide for taking care of your tarot and oracle cards!
Have a growing collection of oracle and tarot cards that you’re always adding to? If you’ve got a growing collection, you probably don’t use all of those cards every day. You most likely have your favorite decks that you gravitate towards, decks you use rarely, and decks that you let other people use.
Your oracle and tarot cards can pick up vibes from other people, yourself, and accumulate stagnant energy. Fortunately, there are several things you can do to keep your decks energetically fresh so you receive and give the best readings.
These tips will work for tarot and oracle alike, they will also work for our free printable decks like our Zenned Out Mini Oracle Cards and our Moon Phase Ritual Cards. Here’s my ultimate list for taking care of your favorite decks!
Listen to Your Cards
Use your intuition. Ask your tarot and oracle cards what they need, and go with your gut. Have a deck that feels like it wants to be kept separate from your other decks, give it a special space of its own. Have a deck that you feel is pining for some grounding energy, put a little smoky quartz near it.
If you decide to try something new with one of your decks, be extra aware of any energetic signals you may get from them on the new change. The best part is, if you’re using your oracle or tarot cards regularly you’re already honing your intuition, and this is another opportunity to refine your intuitive skills.
Spread Cloth
Create a sacred space for reading your cards with a spread cloth. Traditionally these have been used for tarot but will work just as well for oracle cards.
Energetically speaking, using a spread cloth gives you and your cards a sacred space for reading wherever you are. It adds another layer to the ritual of reading your cards. Bonus, if you read in other places, it will help keep your cards clean.
Deciding on a spread cloth can be simple and inexpensive. There are many are beautiful handmade options on Etsy but you might already have something perfect at home like a silk scarf. Color carries a lot of energetic weight, so I suggest doing some research on color meanings before deciding on your spread cloth.
Cleanse Often
If you’ve had some off readings that didn’t feel quite right it might be time to give your cards a good energetic cleanse. Another reason to cleanse your cards is if they’ve been sitting for a while and haven’t been used. Stagnant decks will pick up all sorts of vibes, so it’s a great time to cleanse them.
Here are three quick and easy ways to lift any bad vibes or stagnant energy from your oracle or tarot cards.
Salt Bath: No water needed for this bath, simply set your cards in a tray of sea salt or Himalayan pink salt and let the salt soak up any unwanted vibes.
Smoke cleanse: Light your favorite herb and let your cards be bathed in the smoke of it to cleanse them. I recommend exploring some plants that are related to your ancestral lineage, some options of herbs are lavender, mugwort, cedar, rosemary. If you want to add some extra fun you can use tools like cauldrons or smoke wands.
Full Moon: Lay your cards in the light of the moon for an energetic refresh. Of course, each moon phase will have its own effect. You can use our Moon Phase Ritual Cards to get an idea of what kind of energy each phase will imbue them with.
Protect Your Cards
You may not want to keep your cards in the box they came in. If you don’t, it’s important that they have a special place to live and have some protection.
Here are some options for protecting your oracle and tarot decks:
Cloth bag: Similar to the spread cloth, the color of the bag you choose matters. Use your intuition and do some research on color meanings to determine the best color bag for your deck.
Wooden box: This is perfect for a deck you feel is calling out for an earthy vessel. A box will also offer additional protection if you travel with them.
Wrap them in your spread cloth: Your spread cloth can serve dual purposes and will work well as a protective cover for your cards
Crystals: Place a crystal on top of your deck, in the bag, or in the box with your cards to offer a layer of energetic protection. You can never go wrong with clear quartz!
Connect with Your Cards
One of the most important things you can do to care for your cards is to connect with them. The more you connect with them the more you’ll know how to take care of them intuitively. Here are two of my favorite techniques for connecting with your tarot and oracle cards.Sleep with them under your pillow or on your nightstand. This tip comes from guest blog post writer Brittney Carmichael. She mentioned in a previous post,
“Sleep with one card under your pillow each night to allow your subconscious mind to create symbols and meanings for the cards. Your tarot cards are like personal love notes from your soul and will help to guide you along your spiritual path of awakening.”
Take time to look at each card. If you’re feeling disconnected from your deck, take a few quiet moments to sit down and look at each card. Similar to sleeping with a card under your pillow, this will give you an opportunity to connect with the symbolism of your cards and become attuned to their energy.
I recently cleansed all my decks and gave some of my favorite decks a special home or crystal. I was surprised by the change when I did this! I immediately felt more in tune with my cards and my readings have felt more on point. I hope you find the same is true for you and your cards!
Rituals for Every Moon Phase & Printable Moon Cards
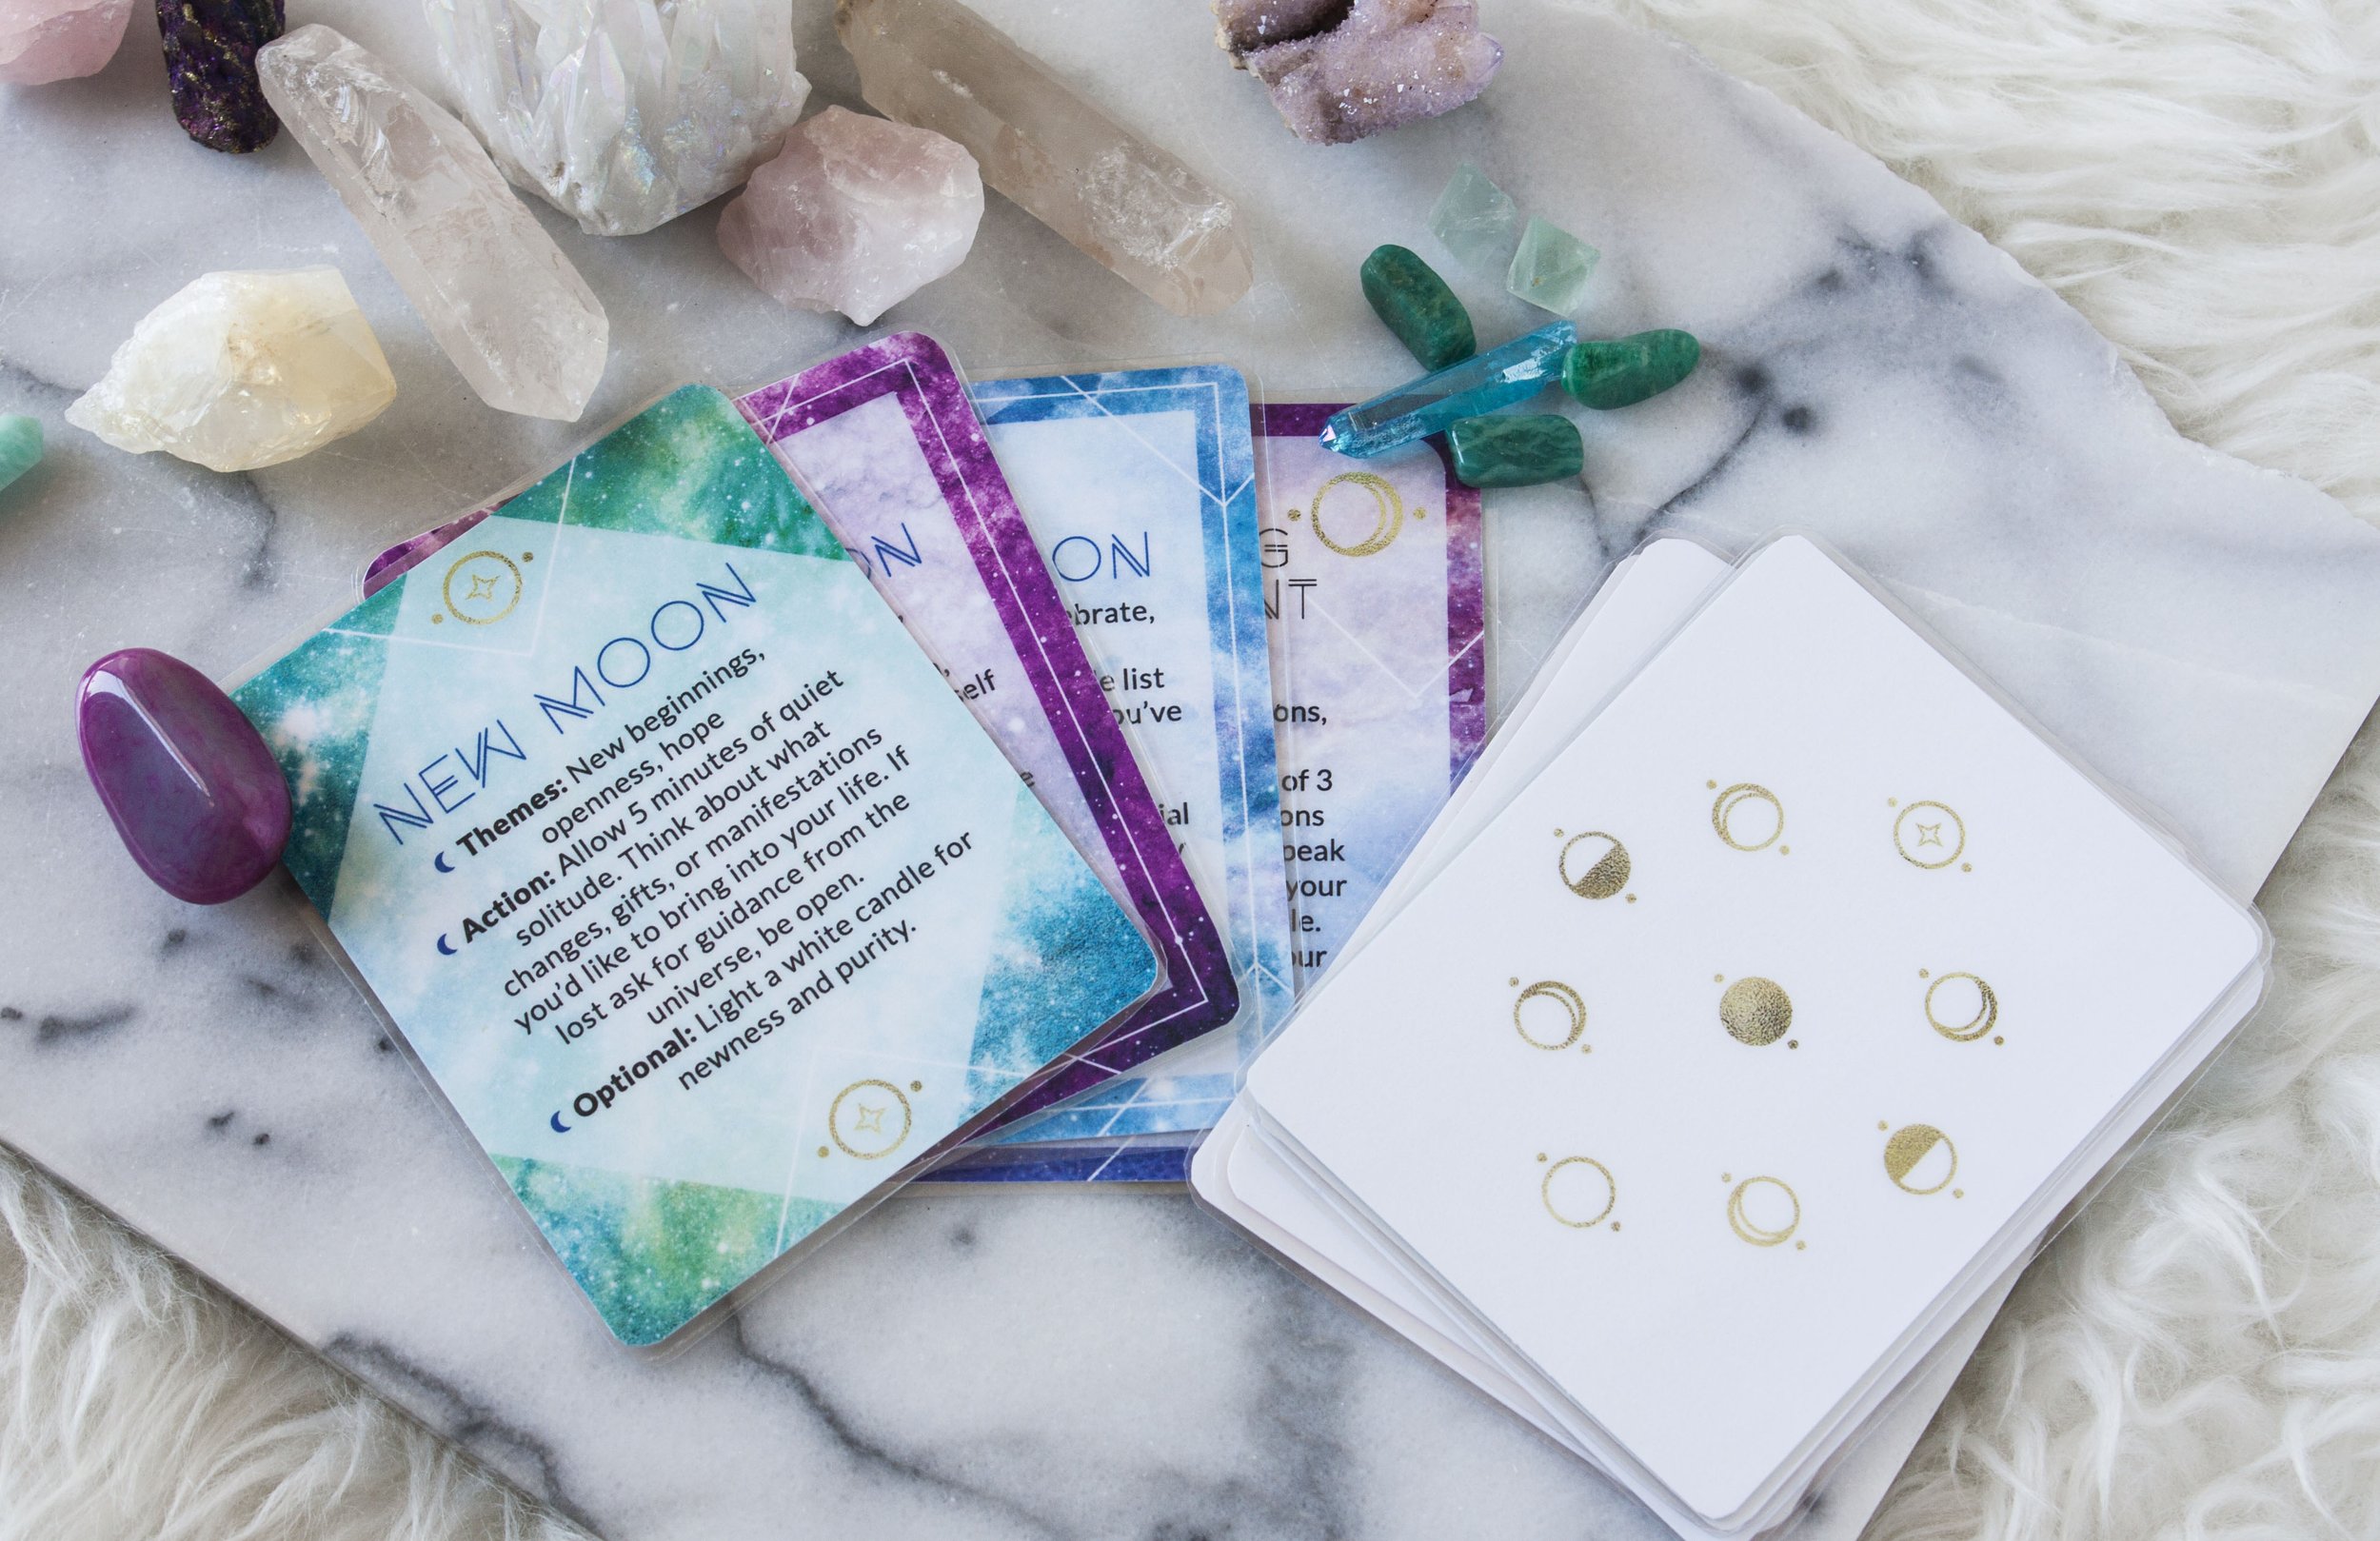
Want to start harnessing the power of the moon, but don’t know where to start? There are simple and powerful things you can do for each moon phase. Scrolling through your Instagram feed, you might just think the full moon and the new moon are the only times worthy of your time. Not true, there is a special meaning behind each phase of our glorious moon Goddess!Every year, I create a moon phase calendar. Hopefully, you already have yours, if you don’t, you can click here to get a digital copy. I’ve received emails from people asking what the best way to use the calendar is. Though there are several ways to use the moon phase calendar, my favorite is for planning rituals based on the phase of the moon.I created a simple and beautiful deck of ritual moon cards so you can better use your moon phase calendar.
Want to start harnessing the power of the moon, but don’t know where to start? There are simple and powerful things you can do for each moon phase. Scrolling through your Instagram feed, you might just think the full moon and the new moon are the only times worthy of your time. Not true, there is a special meaning behind each phase of our glorious moon Goddess!
I created a simple and beautiful deck of ritual moon cards so you can better use your moon phase calendar. To get your printable moon cards, click here.
How to Use this Deck
None of these rituals require you to have anything except some time, space, and maybe a pen and paper. I do provide optional additions to each ritual that include accompanying tools like crystals, but they are all optional! Even better, you do not have to do these rituals in order. If the mood hits to do a moon phase ritual for the waning gibbous, but you didn’t do the ritual for the full moon, that’s fine!
Click here to download your free moon phase ritual cards from your email, print them on card stock paper, cut, laminate them if you wish, and use your moon phase calendar to see what phase you’re currently on. There are instructions for assembling your moon phase ritual cards within the free download. Don’t want to download a deck? You can simply check out my rituals below.
New Moon
☾ Themes: New beginnings, openness, hope
☾ Action: Allow 5 minutes of quiet solitude. Think about what changes, gifts, or manifestations you’d like to bring into your life. If lost ask for guidance from the universe, be open.
☾Optional: Light a white candle for newness and purity.
You can also check out this blog post for a new moon card spread.
Waxing Crescent Moon
☾ Themes: Set intentions, declare, cleanse
☾ Action: Create a list of 3 goals or manifestations you’d like to realize. Speak your list out loud. Put your list somewhere visible.
☾Optional: Cleanse your space with a smoke wand or herb.
First Quarter Moon
☾ Themes: Focus, momentum, face your fears
☾ Action: Choose one goal or manifestation you’re focusing on, commit to taking one action towards making it a reality within the next 24 hours.
☾ Optional: Tell one trusted soul your action to hold you accountable.
Waxing Gibbous Moon
☾ Themes: Refine, adapt, align
☾ Action: Allow a quiet moment, ask the universe for signs on how you can better align with your intentions.
☾Optional: Using divination tools like oracle cards, tarot, or runes, ask the universe for clear instructions on moving forward.
Full Moon
☾ Themes: Harvest, celebrate, gratitude
☾ Action: Write a gratitude list that includes everything you’ve accomplished over the last two weeks.
☾Optional: Let the moon's special relationship with water amplify any goals that have not yet come to fruition. Write down intentions you’re still working on, place the paper in a bowl of water under the light of the moon.
Waning Gibbous
☾ Themes: Reflect, meditate, receive
☾ Action: Meditate for 5 minutes. Before you begin ask the universe to shed light on your progress, or lack of progress, with your intentions. Receive and allow.
☾Optional: Take a bath with frankincense and myrrh essential oils to allow extra time for reflection. These scents will help you meditate and better tune into your inner knowledge.
Last Quarter Moon
☾ Themes: Release, surrender, let go
☾ Action: Choose something to remove from your life that is no longer serving you, a physical object, personality trait, or relationship. Write it on a piece of paper and burn it in a cauldron or other fireproof vessel.
☾Optional: Get in touch with your shadow side by tapping into the energy of the Goddess Kali.
Waning Crescent
☾ Themes: Accept, forgive, allow
☾ Action: Lay down for 5 minutes, mentally scan each part of your body, take notice of any areas you feel resistance. Be present with any resistance you feel in your body and offer it love.
☾Optional: Carry a piece of rose quartz with you to offer loving support during this sometimes painful process.
Dark Moon
This phase is often ignored, but I find it to be an important phase to recognize.
☾ Themes: Rest, self-care, reflection
☾ Action: Take everything in, relax, do nothing. Allow yourself space and time to simply be.
☾ Optional: Lay down, place a quartz crystal on your third eye and allow its subtle energy to wash over you, heal you, and calm you.
I hope you adore your deck of moon ritual cards and are inspired to have some moon rituals of your own! Be sure to tag @cassieuhl on social media to show off your deck.
Rituals for an Abundant New Year
What does abundance look like or feel like for you? Maybe it is money, but maybe it’s not. Abundance can come into our lives in a multitude of forms: health, equality, love, beauty, or money. What is it that you’re hoping to manifest more of in the new year? More specifically, what do you want an abundance of?
What does abundance look like or feel like for you? Maybe it is money, but maybe it’s not. Abundance can come into our lives in a multitude of forms: health, equality, love, beauty, or money. What is it that you’re hoping to manifest more of in the new year? More specifically, what do you want an abundance of?
I’ve spent the last couple of weeks sharing ways to energetically prepare for the new year. First I shared a closing ceremony using Runes to help you energetically clear for newness, and last week I focused on gratitude rituals to start the year with an open heart. Now, the new year is here and it’s time to think about what you want an abundance of in the year to come.
Embarking on a new year can feel overwhelming, or if you’re like me you might have a touch of FOMO (fear of missing out) in regards to what methods are the best for planning out a new year.
I’m going to share some of my personal tried and true tips for embarking on a new year that have served me well and some new ones that we can explore together! As with all of my ritual suggestions, take what you like and leave the rest. Do what feels good to you, and modify any of the steps to suit your needs.
Warning! This post is packed full of gems and is a bit longer than most of my posts, BUT it’s a topic I’m very passionate about so brew a big cup of tea and dig in!
Heart Opening Exercise
In order to receive abundance, you must be open to the abundance. So, let’s ditch the slumped-over shoulders and rounded spine and start by getting your body in touch with the abundant energy of the universe with some heart-opening poses.
Think of opening your heart center as dis-armoring yourself. Follow along with me for a simple, heart-opening exercise.
In a seated position (cross-legged on the floor or in a chair), imagine a golden thread of energy traveling through your body, your seat, and into the core of the Earth. Feel grounded and weighted to the Earth.
Take 3 deep breaths here acknowledging how grounded you feel. In each breath that you teak feel your spine elongate. Imagine that the air you’re breathing in is expanding the discs in your vertebrae and making you taller from the ground up.
In your next inhale bring your shoulders up by your ears, and as you exhale draw your shoulder blades down your back. Repeat this three times.
On your last exhale place your hands on your thighs, gently squeeze your shoulder blades together on your back to broaden your chest, and feel your spine expand and open in your heart center.
Take several breaths here. Feel the expansion in your heart center while simultaneously acknowledging how grounded you are to the Earth. Welcome any feelings and ask for openness.
Ask for What You Want
If you want the universe to bring you abundance, an essential step is to ask for what you want. This may seem glaringly obvious, but it’s a simple step that many neglect.
There are several ways to tackle this step. You could simply announce out loud what it is you want to manifest in 2017 or you could invest in a workbook to help guide you through the process.
I use Leonie Dawson’s “Shining Biz” and “Shining Life” workbooks at the start of the year and LOVE them. Want to sprinkle some miracle grow on your year? These workbooks will do the trick, plus they’re beautiful and interactive. Click here to grab your own workbooks
UPDATE (2021): we're updating all our blog posts and now the workbooks have changed from the "Shinning Biz" and "Shinning Life" to the "Goal Getter". I suggest following Leonie on Instagram to make sure you don't miss out on any of her new year planners.
There are countless, amazing workbooks out there and if rainbows and fairies aren’t your jam, I’m sure you’ll be able to find a workbook that’s perfect for you. The main points: get clear about what you want, ask for it, and plan it out!
Let Your Higher Self Guide You
No ritual from me would be complete without some oracle card action! Once you’ve got some clarity on what you want to manifest in the new year, grab your favorite oracle card deck, or if you don’t have one you can get our free one here.
Close your eyes and focus your mind on what you want to manifest, then ask your spirit guides or higher self what you need to focus on in order to manifest your 2017 dreams. Spread out your cards face down, and choose the card you’re called to. Personally, I like to place important cards like this on my altar for some time to allow time for the message to really sink in. Reflect on how you can use this information in the year to come.
Follow the Moon
I’m sure you’ve set intentions for the New Year before, and come March they’re a distant memory. I’ve been there too. The phases of the moon are a potent tool for goal setting, abundance bringing, and manifesting.
Of course, you’ll need a moon phase calendar to do so, but don’t worry I’ve got you covered! You can purchase a digital copy of the moon phase calendar here (Each year we update the moon phase calendar, so don't worry if you're reading this in 2022)
A quick guide for using the moon to bring abundance:
New Moon: Focus on your new year's intentions. This is a good time to focus on some of the smaller steps you need to take to get to where you want to go.
Waxing Moon: Take actions towards your goals
Full Moon: Let go of things no longer serving you.
Waning Gibbous: Be grateful for any gifts that have come your way as a result of your work in the previous phases.
Waning Crescent: Rest, renew, restore
These small actions can have a profound effect on your year to come. I know, because I’ve had years that I’ve done nothing and years that I’ve taken the time to dig deep and think about how I want to feel in the year to come. You deserve all of the gifts the universe has to offer but you have to ask!
Have a favorite New Year ritual that you use? I’d love to hear about it!
Understanding Birth Chart Basics in 6 Steps
So, you made birth charts for everyone you know but then they wanted to know what it all meant! Today, I’m going to help you decipher the lovely birth chart you made last week. Learning how to decode an astrology birth chart can be a little bit like going down the rabbit hole. Let me save you a headache and break it all down for you into six nice little steps!If you want to brush up on your astrology terms visit the first post in this series here. If you need to, grab your free printable birth chart and learn how to make it click here.First, a few things to point out about your birth chart. Think of your chart as a map of your potential. Sometimes you may get lost, take an alternate route, or change paths completely. Your birth chart is not your fate, but it can help guide you.
So, you made birth charts for everyone you know but then they wanted to know what it all meant! Today, I’m going to help you decipher the lovely birth chart you made last week. Learning how to decode an astrology birth chart can be a little bit like going down the rabbit hole. Let me save you a headache and break it all down for you into six nice little steps!
If you want to brush up on your astrology terms visit the first post in this series here. If you need to, grab your free printable birth chart and learn how to make it click here.
First, a few things to point out about your birth chart. Think of your chart as a map of your potential. Sometimes you may get lost, take an alternate route, or change paths completely. Your birth chart is not your fate, but it can help guide you.
Rising/Ascendant Sign
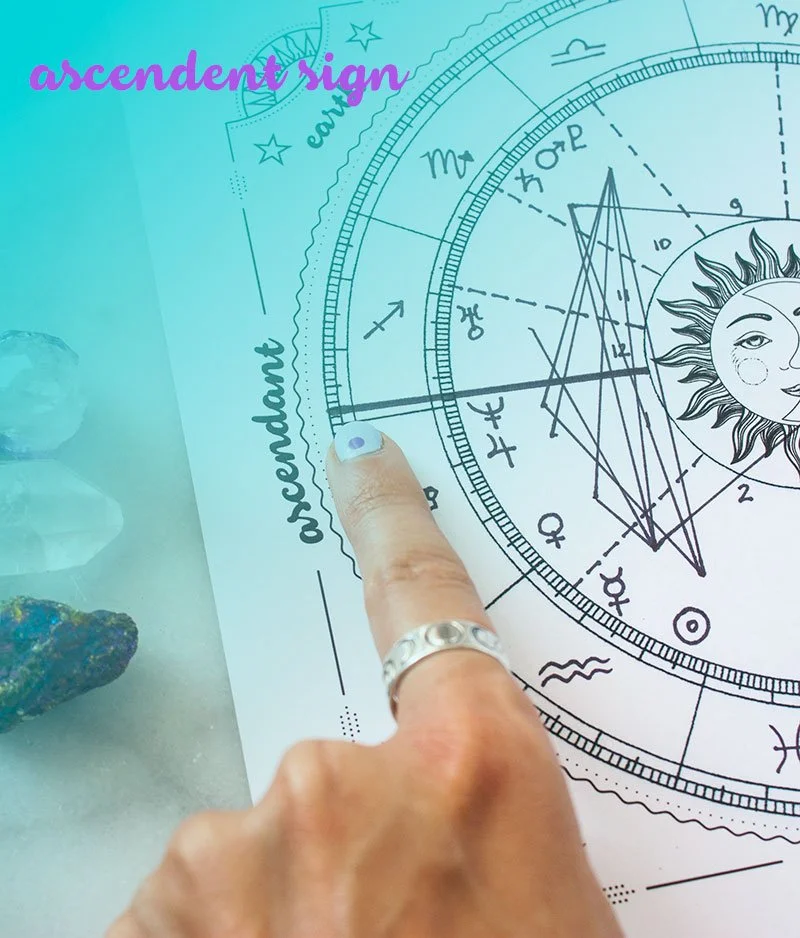
Your rising sign is how you present yourself to the world and is usually the first impression that you give people. Find your rising sign on the left side of your chart, you should have an arrow or a line pointing to what zodiac sign it falls into. Click here to learn more about your rising sign at Astro Library.
Sun & Moon Sign
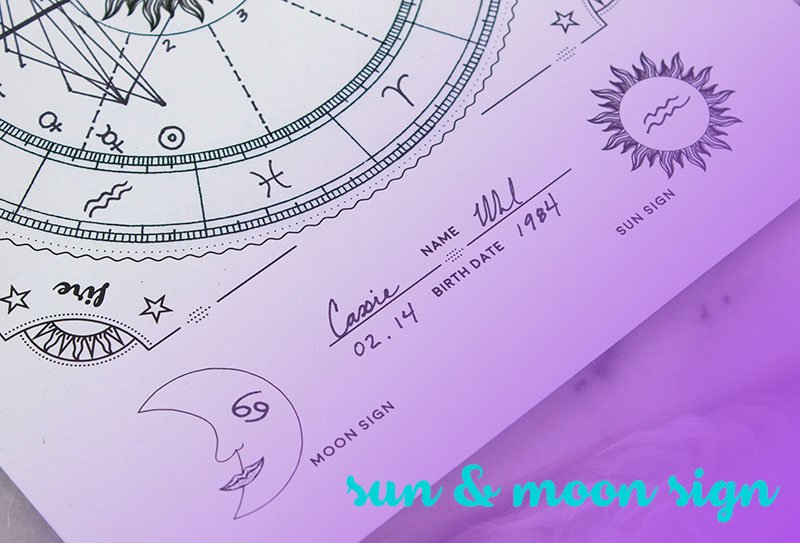
Your sun sign is the core of your personality. Though your Ascendant sign might be what shows up first when you meet someone, your Sun sign is what comes out once you’ve gotten to know that person. Check out what your Sun Sign says about you here.
Your big, bright and bold Sun sign personality traits need some balance and that’s where your Moon sign comes in. Think of your Moon sign as your shadow side, more subtle and soft. Moon sign personality traits will often show up when you tap into your intuition. Check out what your moon sign says about you here.
The Other Planets
Though your Sun and Moon signs do bear a lot of weight when it comes to your personality, there 8 other planets that can shed light on your personality as well. Take a look at your chart to see which Zodiac signs your planets fall into, then check what they mean here.
The Elements
Take a look at where each of your planets falls on your birth chart. Each planet will fall into a zodiac sign, and each zodiac sign has an element assigned to it. Add up how many of each element is represented on your chart. Here’s a great link to understand how your prominent elements may affect you. See the guide below to know which signs fall into which element.
Houses
Each of your planets also falls into a house. These are the pieces of the pie that are numbered 1-12. Your houses will show you where your personality traits may manifest in this lifetime. Here’s a quick description of what each house represents. Dive deeper into understanding the different houses here.
You can use this reference to see what having certain planets in each house may mean for you.
Aspects
This one was a challenge to fit into one step, but it’s an important one so here it goes! Your aspects indicate the relationship of your planets with each other. Their relations with each other are shown with all those crazy lines in the middle of your chart. Though the crazy lines on your chart do look pretty cool, this is one step that is worth referencing your computer-generated birth chart. I’ll be referencing the L shaped grid below your computer-generated chart for this.
Your aspects can make a big difference in your chart and leaving this step out wouldn’t give you a full picture of your life path. Your aspects indicate how your planets may manifest, each planet has a balance of positive and negative energy.
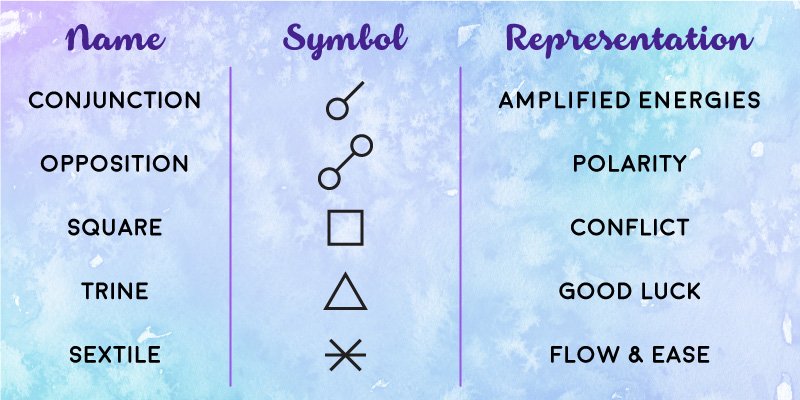
For this post, I’ll only be referencing the major aspects. You may see some symbols on your chart that aren’t represented here, those are minor aspects (another thing you can explore down the Astrology rabbit hole!). Here’s a chart that indicates what each of these symbols looks like and what they represent. Cross-reference with your chart to see how your aspects will affect the energy of your planets.
Addictively fun right?! Like I said, there are endless things you can learn about astrology and your birth chart.
DIY Birth Chart in 10 Steps & Printable Birth Chart
Have you ever wished that you had a roadmap for your life? But does the thought of making another adult decision cause you a little sadness inside? I’m right there with you.This week I’m going to teach you how to create your own astrological birth chart and you might be surprised how telling this chart is! Bonus, I’ve even got a free printable so your birth chart will be frame-worthy.
Have you ever wished that you had a roadmap for your life? But does the thought of making another adult decision cause you a little sadness inside? I’m right there with you.
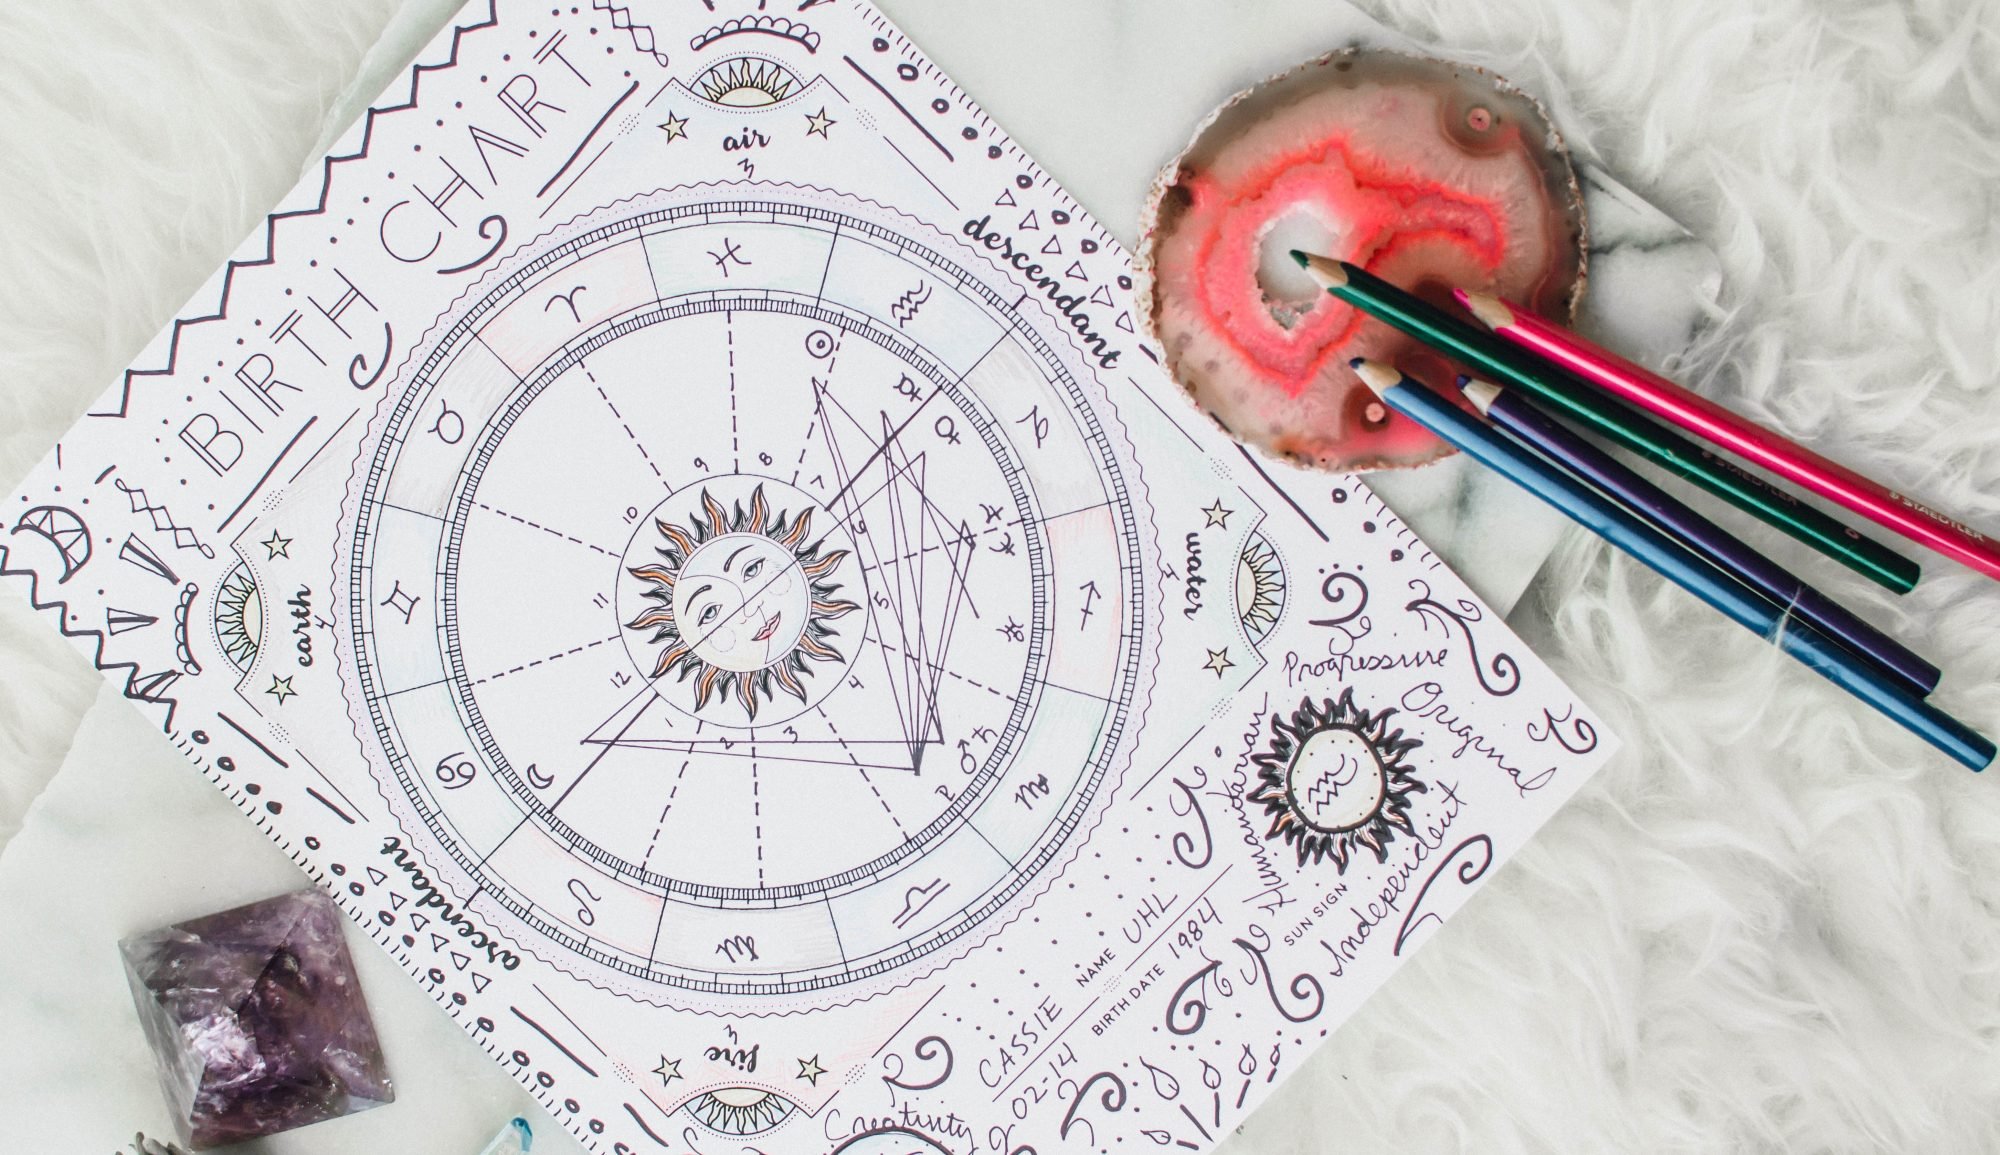
I will teach you how to create your own astrological birth chart, and you might be surprised by how telling this chart is! While you can easily find birth charts online, making your own serves a valuable purpose. Making your own birth chart helps you learn the anatomy of your birth chart and better understand how to read it. If you learn best from doing, I highly recommend creating your own birth chart.
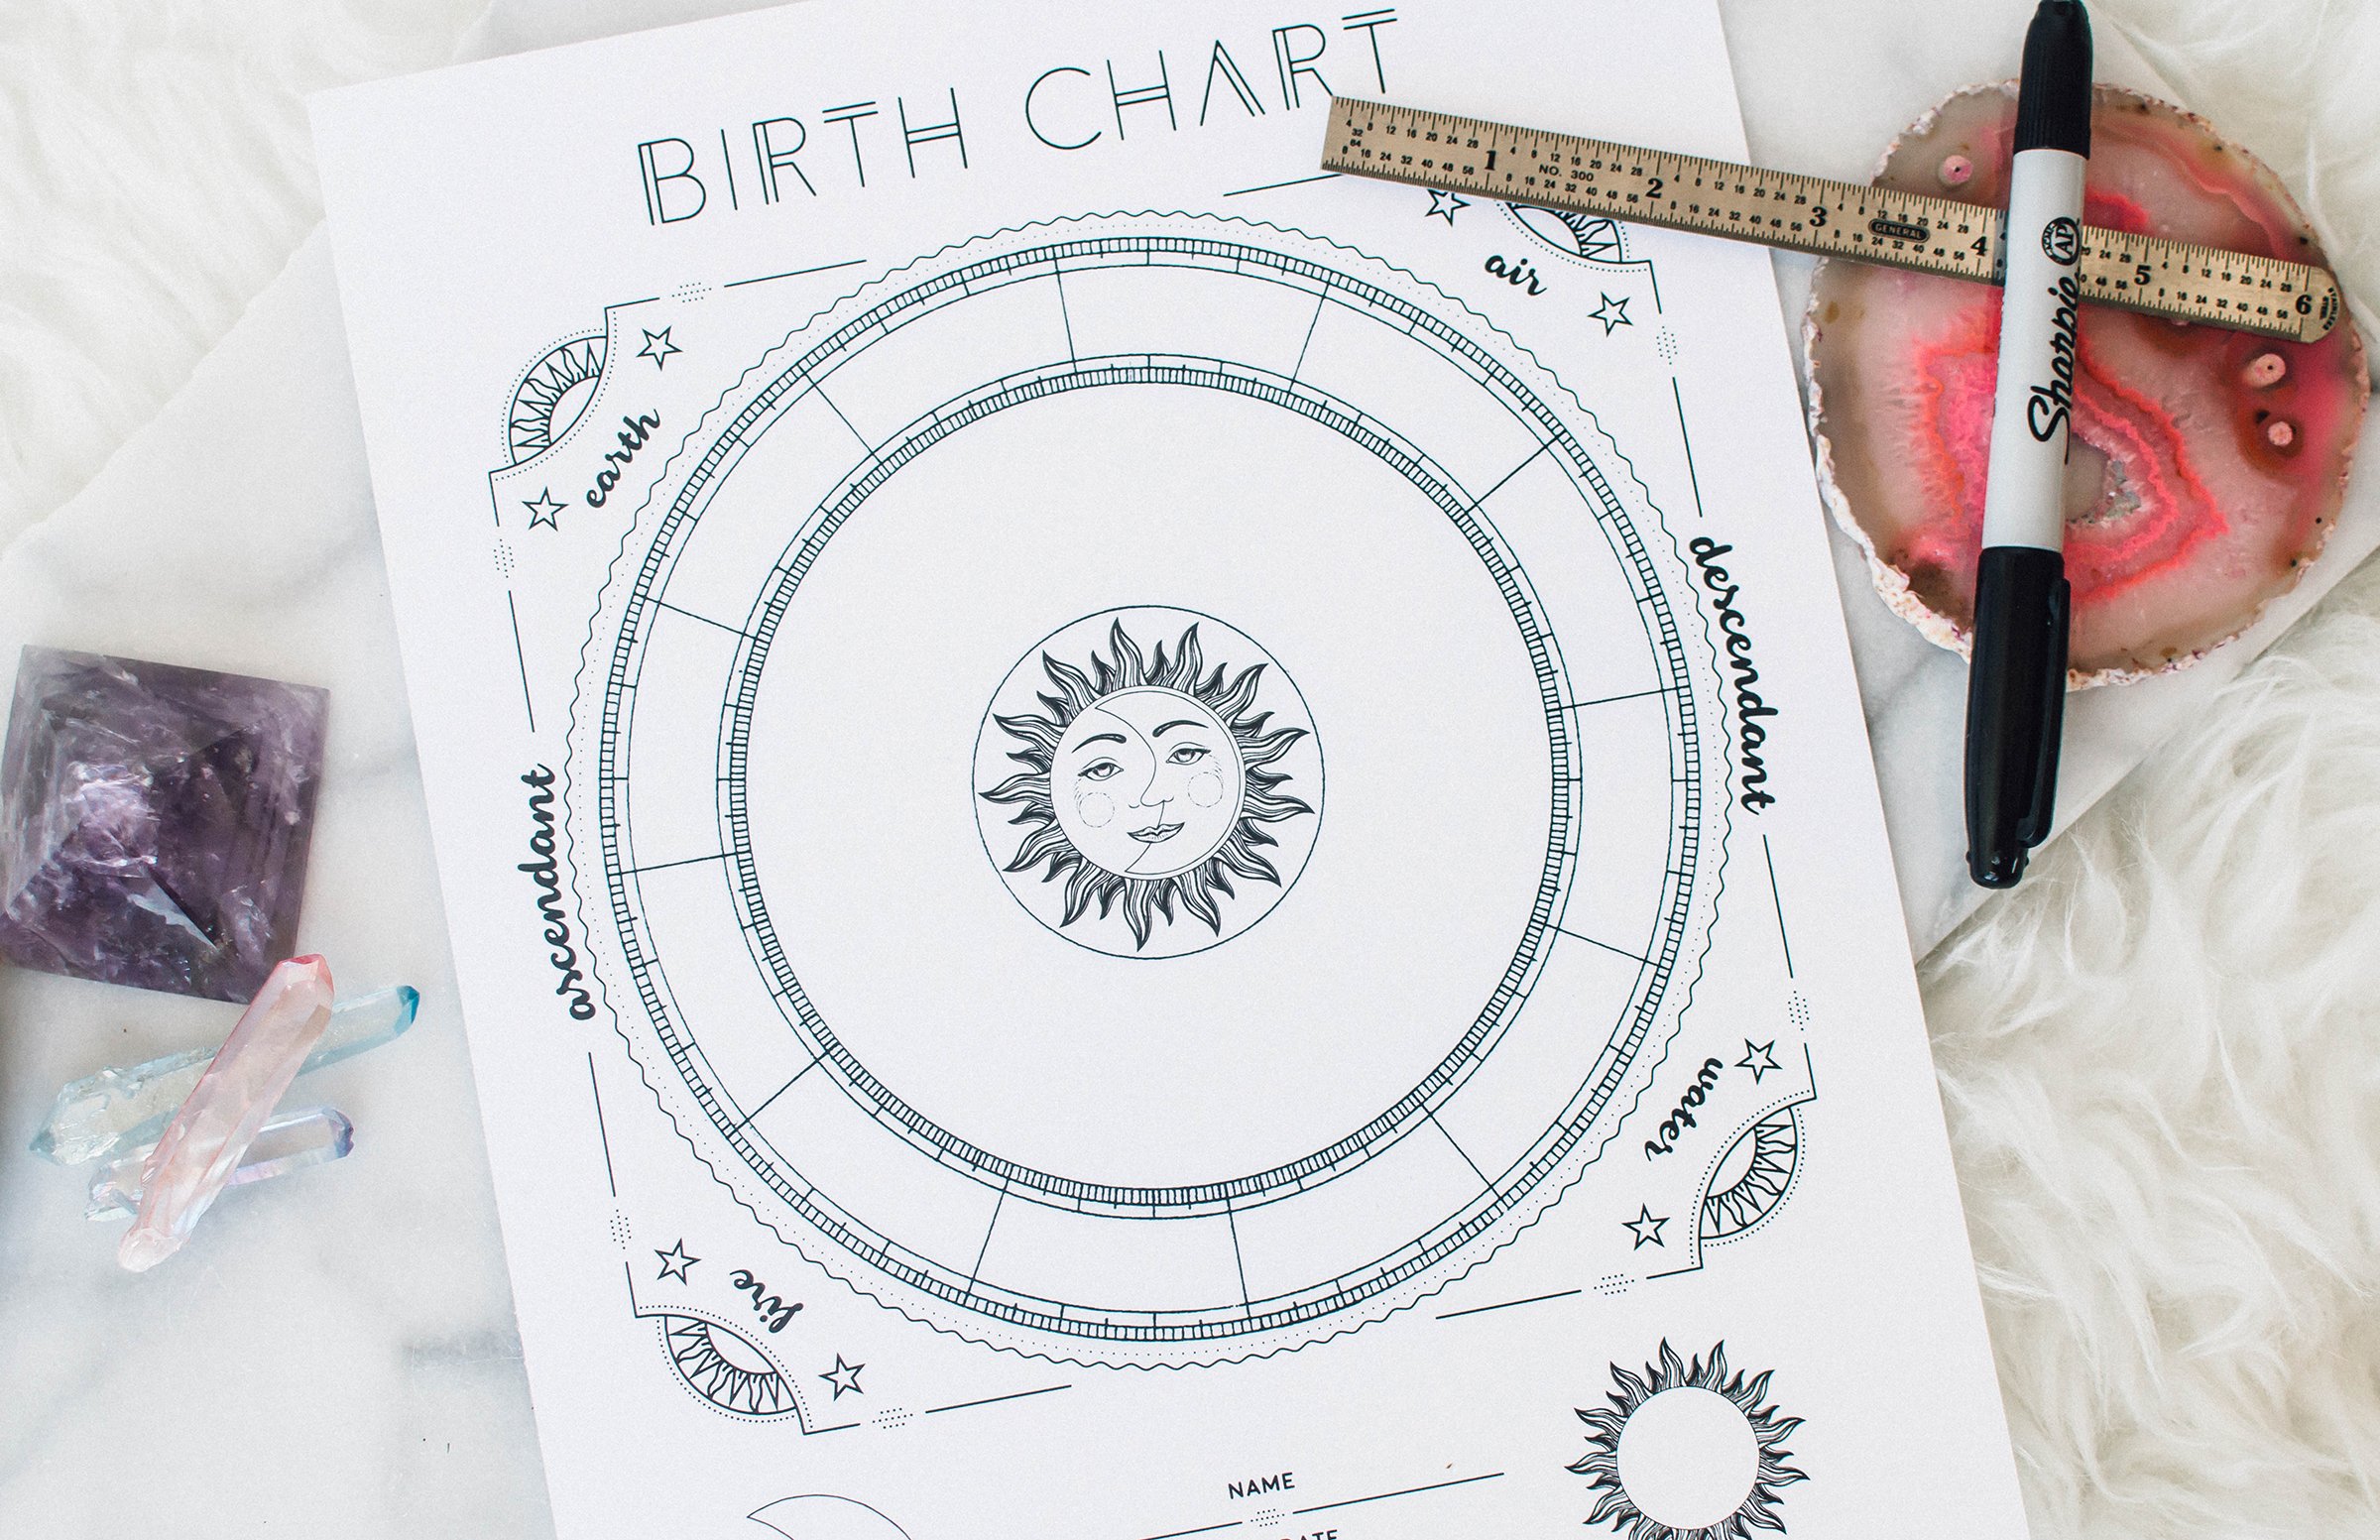
Bonus, find a printable birth chart to make yours frame-worthy. Get it along with my other magical printables here.
What is a Birth Chart?
A birth chart, also called a natal chart, is a chart that shows where all of the planets were at the moment you were born. A few factors play into your birth chart, the time and day you were born and the location you were born. With just this bit of information, the heavens can reveal truths about your personality, your life path, and how to get the most out of this lifetime.
Making Your Birth Chart
The free birth charts online are great for gathering information, and that’s exactly what we will use them for, but if you want to gift a birth chart or hang one on your wall, making your own is the way to go!
You can even get some extra practice and create natal charts for your loved ones as gifts. Plus, making your own is a great way to learn all these terms.
Need to get some of the astrology basics down? Check out this post to learn basic astrology lingo.
Step 1
Click here to receive your free printable birth chart.
Step 2
Gather your supplies. You’ll need:
Birth chart printable
Pen or pencil
Straight edge
Colored pencils for decorating! (optional)
Birth Date, time, and location
Step 3
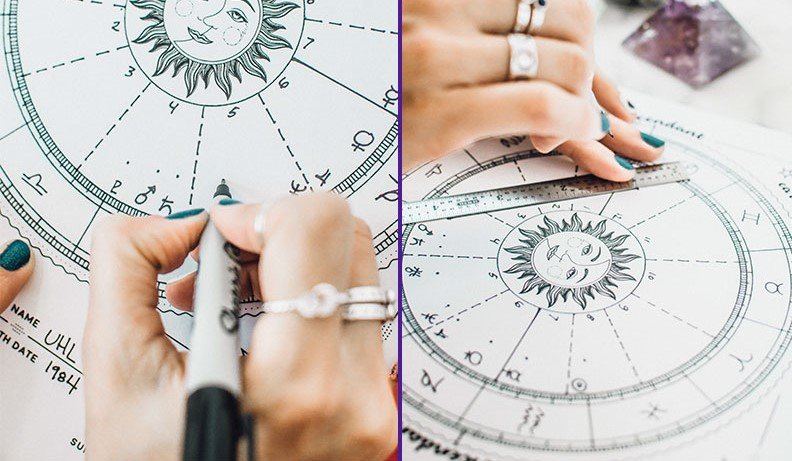
Get a free birth chart report here as a reference for your DIY chart. Simply plug in your info, submit, then scroll all the way to the bottom of the page to the circular chart, that’s what we’ll be using.
Step 4
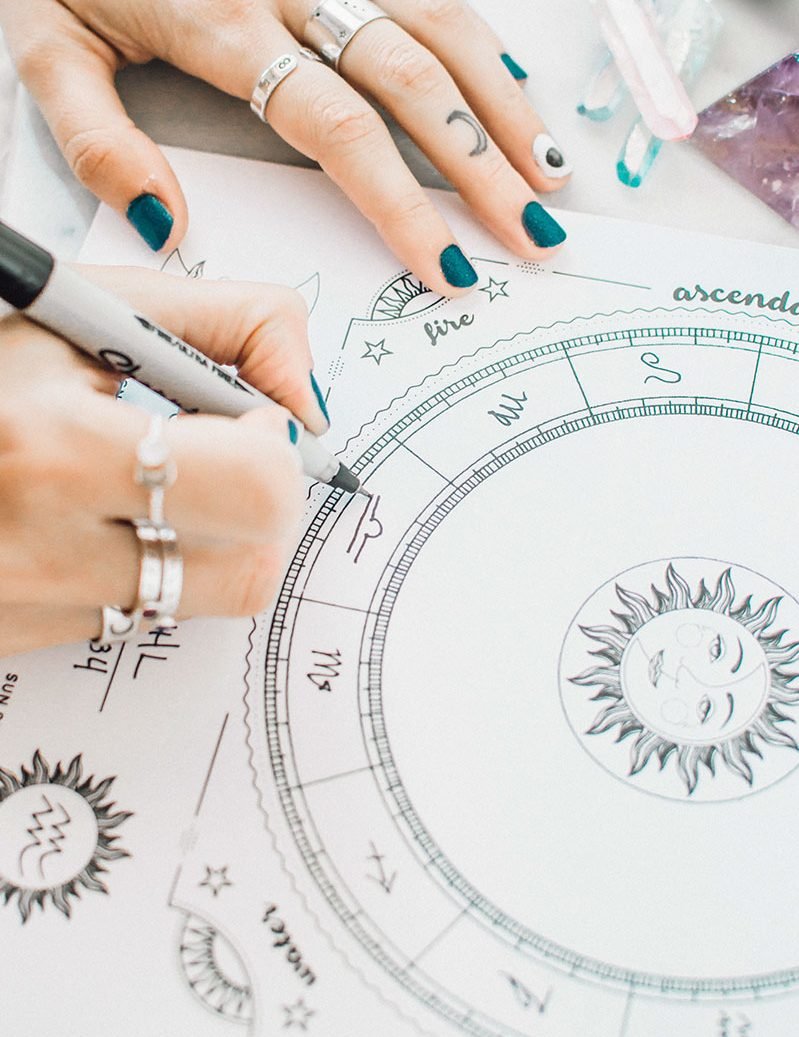
Look at your online chart to see where the zodiac signs fall on the outer wheel. Draw them in on your chart.
Step 5
Write your name and birthdate on the chart.
Step 6
Draw in your sun and moon sign in the sun and moon pictures underneath the wheel. To figure out your sun and moon signs, look at your online chart. Find the moon symbol and see what zodiac sign it is in, and then find the sun symbol (a circle with a smaller circle inside) and see what zodiac sign it is in.
Step 7
Now we’ll draw in your ascendant and descendent line. On your online chart, there’s an arrow that’s pointing to a degree mark on the left side of the chart, this is your ascendant sign. You can also see it notated in the key below it with the number location it is in. Make a small dot on the inner circle of tick marks on your printable of where it will go, then make a dot on the opposite side of the chart, that is where your ascendant sign is. Use your ruler to connect these dots.
Step 8
Next, we’ll draw in your houses. Looking at your online chart, make a little mark on your printable where each house starts and ends. The houses are the numbered areas 1-12 or AS-XII on your online chart. Once you’ve marked each one, use your straightedge to create a dashed line to separate the houses. Starting at the house right below your ascendant sign draw in numbers or roman numerals 1-12 going counterclockwise around the wheel.
Step 9
My favorite part! Draw in where your planets fall on your chart. Look at your online chart to see where they are and draw them in roughly the same area on your printable chart. You can reference the key below the chart again to see the degree that each planet is at, and then make a tick mark at each one on your printable so you know exactly where to draw your planets in, or you can eyeball it. You can decide to draw the line that points to the degree mark it’s at or not, it’s up to you.
Step 10
The final step, draw your aspects, all those crazy zig-zag lines around the chart. Remember this chart is more for show and doesn’t have to be perfect so don’t stress over this step! The easiest way to complete this step is to make a little dot in the middle ring each place there is a planet, about an inch away from the planet you drew. Then, using your straight edge, and referencing your online chart, connect the dots, in the same order that they’re connected on the online version.
Now you can decorate your chart however you’d like or leave it as is. Learn more about decoding your birth chart here.
5 Simple Full Moon Rituals
Here we are, at the culmination of everything you set out to manifest with the new moon. You planted seeds of goals and intentions with all of your best effort and resources, and you have finally arrived at the full moon.On the 16th of this month, the moon will shine in all of her full-bodied glory. The full moon will be at her peak of life and power, and I'm going to share with you a few ways to tap into this power!
Here we are, at the culmination of everything you set out to manifest with the new moon. You planted seeds of goals and intentions with all of your best effort and resources, and you have finally arrived at the full moon.On the 16th of this month, the moon will shine in all of her full-bodied glory. The full moon will be at her peak of life and power, and I'm going to share with you a few ways to tap into this power!
Burn a Habit
It's been said that the light of the full moon illuminates the things that no longer serve us. Take advantage of this by releasing fears, bad habits, and negative self-talk. How, you ask? Burn them to the ground! (With caution of course.) This ritual will serve you best if performed on the waning moon side of the full moon, which is usually the second day of the full moon.
Under the light of the full moon write down these items on little slips of paper. Add them to a mason jar with a lit candle in it (OR if you are super rad and have a cauldron handy, then use that instead). As you see, these “bad habits” go up in smoke. Send them up to the moon!
Gratitude List
Since the new moon, you have been manifesting your intentions and surely you have experienced some success! Begin a list that includes all you have to be grateful for. Don't forget to include the items you perceive as failures. There are lessons to be learned there! When you’ve completed your list, give a gift back to the moon for all she’s given you! Try an offering of dried flower petals.
Smoke Cleansing
The energy of the full moon is extremely purifying, couple this with your favorite cleansing smoke for a powerful combo! There are a variety of herbs to choose from for this purpose. Fallen cedar, lavender, mugwort, and desert sage are all great options! Waft the smoke around yourself and your space while visualizing any negative energy floating away with the smoke, then visualize purifying light from the moon filling in the place of any negative energy.
Ask for More
Float your desires in water to ask for an increase of something in your life. The moon has a special relationship with water. The energy of the earth and the moon pull at each other, but the earth just can’t hold onto its water. During a full moon, the Earth’s tides are amplified. So, to amplify results for your desires, float them in water in a glass bowl under the light of a full moon. This ritual will serve you best if performed on the waxing moon side of the full moon, which will be the first day of the full moon.
Moon Bath
Use the full moon’s detoxifying properties to draw out mental, emotional and physical toxins. If possible, add Himalayan salt crystals to your bath during the full moon. Himalayan salt crystals are a super pure mineral-rich salt that is mined from ancient sea beds. It has a number of detoxifying benefits...balancing pH, reducing inflammation...and when mixed with water this crystal's energy can be felt in full force! Dissolve 1-2 cups of Himalayan salt in warm water for your cleansing moon bath!
I hope you enjoy these tips and make it a regular practice to honor the moon’s cycle. By doing so you will align yourself with the rhythms of Mother Moon and feel more in sync with Divine Feminine energy.
Sacred Geometry Symbol Meanings
Divine spiritual connection, that’s what you strive for, right? Complete and inner peace. The contentment of your place both in and out of, this world. The sensation that you are divinely cared for. If you’re like me, you’re always looking for meaningful ways to energize your spiritual connection. Think of sacred geometry as your doorway to the light of the universe. Gazing at sacred geometry during meditation, wearing it, and drawing it can all be used to make you feel more in tune.But, I’ve got more than enlightened know-how for you today! Read on to learn more about sacred geometry and receive your free printable coloring page to get you in the zone.
Divine spiritual connection, that’s what you strive for, right? Understanding the meanings of different sacred geometry symbols can help strengthen your connection. The contentment of your place, both in and out of this world. If you’re like me, you’re always looking for meaningful ways to energize your spiritual connection and the sensation that you’re divinely cared for. Think of sacred geometry as your doorway to the light of the universe. Gazing at sacred geometry during meditation, wearing it, and drawing it can all be used to make you feel more in tune.But, I’ve got more than enlightened know-how for you today!
Read on to learn more about sacred geometry and get a printable seed of life coloring page here.
What is Sacred Geometry?
This yearning for closeness is nothing new. Some believe that a form of communication can be found from reconstructing geometric patterns found in the natural world. These patterns present themselves in the nautilus shell, the human eye, and molecules of our DNA, snowflakes, even the air we breathe. When these patterns are replicated it is called Sacred Geometry.Sacred Geometry has been used in the making of the pyramids of Egypt and Mexico, Stonehenge and the Mayan temples (to name a few). Sacred Geometry is thought to be the blueprint of creation and the language of the gods. So, it’s no wonder that these symbols have become admired and replicated all throughout human history.Without having to go so far as visiting the pyramids, you can apply sacred geometry in your everyday life! Here are a few patterns to get you started.
The Flower of Life
Holds within it the basic information of all living things. It is the visual expression of the interconnectedness of all life forms.
See this symbol in your mind’s eye during meditation, or while chanting, as a reminder of your connections with all other humans and this world.
The Seed of Life
Card features from the discontinued Ritual Deck
This universal symbol for creation is thought to represent the seed from which all life was made. This seed holds the intelligent blueprint for all life.
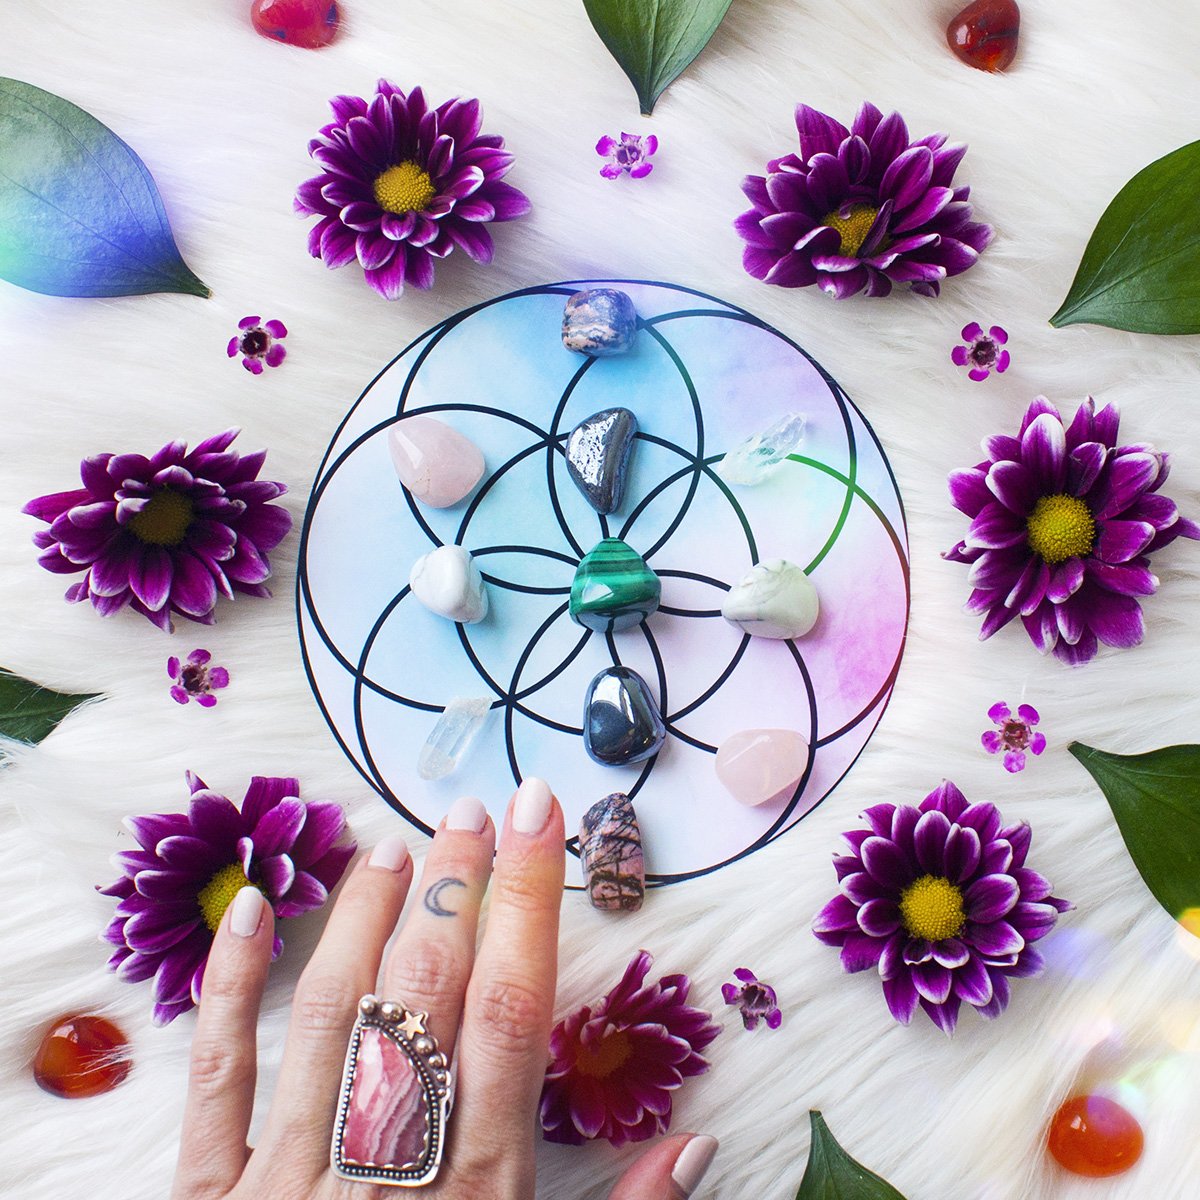
Color this pattern to depict the colors of your seven chakras! The way the colors overlap is referred to as the soul spectrum. Use your soul spectrum pattern as a crystal grid or to charge your crystals prior to chakra work! Let your colorful soul shine!
Click here to get your printable Seed of Life coloring page.
Sri Yantra
Traced back through Hinduism, this pattern is said to be the visual expression of OM.
Meditate on this symbol to inspire enlightenment. Attune yourself to the universal consciousness or wear a Sri Yantra charm for wealth, strengthened relationships, peace, and alignment with the universe.
I can’t wait to see your soul spectrum pictures, be sure to tag @cassieuhl so I can check them out!


