3 Summer Solstice Rituals to Light Your Fire!
The summer solstice occurs around June 20th and brings with it the most daylight hours of any day of the year! It’s no surprise that there are centuries of Summer Solstice rituals involving heat, fire, and the sun. I’ve selected a few of my favorite ways to honor the sun, light your internal fire, and get creative with a free coloring page to help you build your own Sun Mandala.

The summer solstice occurs around June 20th and brings with it the most daylight hours of any day of the year! It’s no surprise that there are centuries of Summer Solstice rituals involving heat, fire, and the sun. I’ve selected a few of my favorite ways to honor the sun, light your internal fire, and get creative with a free coloring page to help you build your own Sun Mandala.
Fire & Candles
Bonfire: In ancient times, fire festivals were a given for celebrating the Summer Solstice. Communities would parade around town with torches, or set tar barrels on fire and roll them downhills! While acts like this may land you in the slammer by today's standards, a more acceptable way to celebrate midsummer is by having a bonfire!
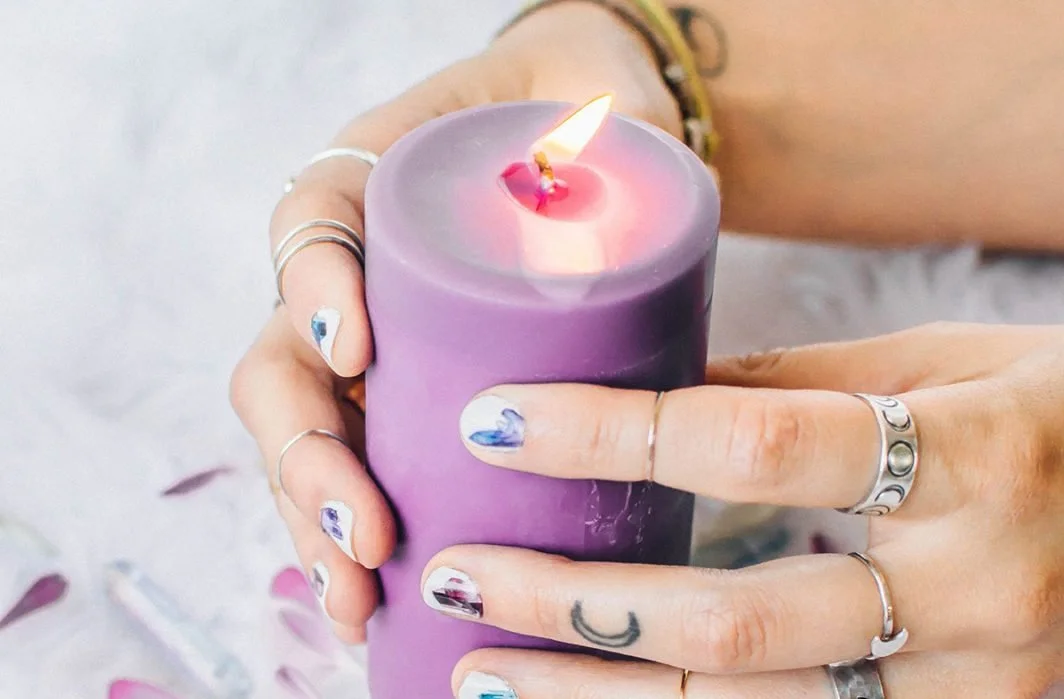
Candles: If you live in the Southwest like me, the idea of having a bonfire might seem like the last thing you want to do in 115 degrees heat! Another option is to light a candle and keep it lit all day at your altar or favorite sacred space (only if you’re staying at home! Safety first!). Spend some time at your altar or sacred space giving thanks to the Sun for its life-giving heat.

Building Your Internal Heat
Enjoy a yoga pose that best honors the Summer Solstice. This is definitely a pose that will ignite your internal fire! The goddess pose is a wide-legged squat that will challenge your mind and body. For an added bonus practice this outside to energize yourself with the sun's rays! Coincidentally, the goddess pose is also known as the fiery angle pose! This is a great posture for building heat in the body and increasing circulation.

Create Your Own Sun Mandala
My favorite and the most beautiful option for honoring this change of season is to create a Sun Mandala. How to make your own Sun Mandala:
Forage for flowers, leaves and twigs
Use sage to cleanse an area inside at your altar or outside where you’d like to create your mandala
Lay your flowers and greenery in a circular pattern
As an added option, add any crystals that you’d like. Carnelian, quartz, tiger eye and sunstone are great options for honoring the Sun.
Add a candle in the center or smaller candles into the design.
As you create your Sun Mandala reflect on the gifts the Sun and the Summer give you and what abundance you’d like to bring into your world this season.

Your Sun Mandala can be simple and small, or a glorious group project with friends. Get creative with it, I’ve got a printable sun mandala color page that you can use as a cheat sheet for where to place your flowers and candles, or it can function on its own as your Sun Mandala. Get your free printable sun mandala here. Be sure to share pics of your Sun mandala and tag @cassieuhl on Instagram. You can find more rituals for the Summer Solstice in this blog post.

Healing Sounds: Tibetan Singing Bowls
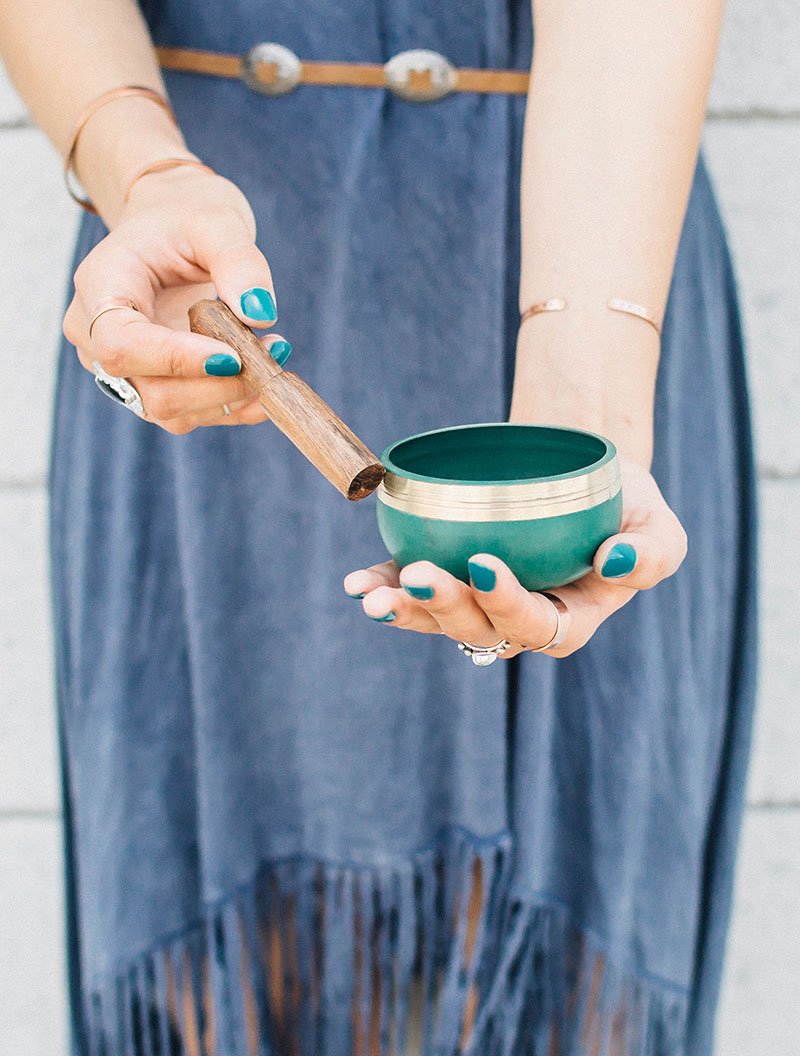
Can you really receive healing energy from singing bowls? I’m sure you’ve seen them in your yoga class, or maybe you’ve even got your own singing bowl. They’re becoming more and more mainstream in Western culture, but what’s all the fuss? Can these pleasant sounds really help heal us from the inside out?singing-bowl-1I’ve done the research for you and have learned that singing bowls can in fact help you heal. (More on this and where to start your collection later.) I also learned about an unexpected communication link between singing bowls and the Buddha, but here’s a little history first.

Can you really receive healing energy from singing bowls?
I’m sure you’ve seen them in your yoga class, or maybe you’ve even got your own singing bowl. They’re becoming more and more mainstream in Western culture, but what’s all the fuss? Can these pleasant sounds really help heal us from the inside out?I’ve done the research for you and have learned that singing bowls can in fact help you heal. (More on this and where to start your collection later.) I also learned about an unexpected communication link between singing bowls and the Buddha, but here’s a little history first.
Where Do They Come From?
Tibetan Singing Bowls date back to 560-480 B.C. and knowledge of the singing bowls were only passed on by high-ranking lamas or spiritual masters. To complicate the passing down of this study, the teachings were traditionally spoken between teacher and student. There’s virtually no written text on the topic! I, however, came across an interview with a lama (spiritual leader) regarding the mystical singing bowls!

Communication from The Buddha
In the interview, the lama told all about how the singing bowls are a means of communication for Buddha, how cool! So, if you are listening to singing bowls, here are a few things you might learn directly from Buddha.
Emptiness: The sound of the singing bowl gives the teaching of broadness and emptiness. This is the essence of Buddha’s teaching. In emptiness, all things are possible. Having a bad day? Emptiness allows feelings and emotions to not linger for too long. It allows us to not take everything so seriously, which I really need a lesson in on a daily basis!
Healing with Singing Bowls
Ok, now here’s some awesomeness for ya! The medical director at the Deepak Chopra Center in California found that both chanting AND Tibetan Singing Bowls are chemically metabolized into internal healing agents and painkillers! Here’s the lowdown on how the singing bowls promote healing in our bodies:
Vibrations: All matter vibrates. When we have an ailment, it is a part of us that is vibrating out of tune. Singing bowls can literally change the matter within you by sending vibrations to your body that bring everything back into harmony. This can be done by having singing bowls played around your body, or even having them played while they rest on top of your body!
Emotional Response: Singing bowls heal us physically because they touch us on deep emotional planes. The sound creates a spiritual awakening that quiets negative self-talk and synchronizes our brainwaves to bring awareness of a mind/body connection.
Mind-blowing right?! Well, if you got as excited as I did about these you might want to start your collection now. I found an amazing shop on Etsy that sells small, very affordable, singing bowls that you can even coordinate with your chakras, check them out here.I’d love to hear any singing bowl experiences you have had, or if you have a favorite singing bowl, let me know! Send us an email.


Essential Oils on the Go // 4 Rollerball Blends for Daily Use
With all this talk of essential oils, I bet you’ll be wanting to take them with you wherever you go! For good reason, too! Essential oils aren’t just something you spritz on your pillow at night. They have so many uses that you’ll wish you had one on hand for every occasion.I’m always on the go, and there are countless moments throughout the day where I’m tired, I’m feeling down….and good god, a pimple!! Where are my essential oils when I need them?? Rollerballs are here to save the day! A perfect little fun-sized container for our precious EO blends.

With all this talk of essential oils, I bet you’ll be wanting to take them with you wherever you go! For good reason, too! Essential oils aren’t just something you spritz on your pillow at night. They have so many uses that you’ll wish you had one on hand for every occasion.I’m always on the go, and there are countless moments throughout the day where I’m tired, I’m feeling down….and good god, a pimple!! Where are my essential oils when I need them?? Rollerballs are here to save the day! A perfect little fun-sized container for our precious EO blends.

What You’ll Need
An eyedropper (many rollerball sets will come with these)
Essential oils
A carrier oil. Any of the following will work wonderfully:
Fractionated coconut oil
Sweet almond oil
Olive oil
Sunflower oil

The Recipes
ZIT ZAPPER
Let’s start with a blend that treats the arch-nemesis that we are plagued by from time to time, if not chronically. Whether a pimple is predictable on a daily basis or pops up at the most inconvenient moment, you need a remedy! So here it is.
20 Drops Lavender Oil
20 Drops Tea Tree Oil
20 Drops Frankincense
Fill with the desired amount of carrier oil and shake to mix
MIDDAY PICK-ME-UP (JET LAG BLEND)
This past month has kept me super busy. I’ve entertained house guests, taken road trips and long plane rides, and “sleep” has become a word from a foreign language. Here's a blend that will wake you up and invigorate your senses. Use this blend to pull you through a study session or to bring clarity to a mental fog while you’re in the office.
8 Drops Eucalyptus Oil
6 Drops Peppermint Oil
30 Drops Lemon Oil
2 Drops Cinnamon Oil
Fill with the desired amount of carrier oil and shake to mix

MOOD SUPPORT
No one likes feeling down, but it happens. It’s part of being human. Maybe someone said something that made you feel less than, or not a part of. Perhaps you are mourning a loss, or you are disappointed about expectations that weren’t met. Try this rollerball blend for some comfort and to improve your attitude. This blend works well when inhaled. Apply it to your hands, cup your hands over your mouth and nose, and breathe deep.
20 Drops Bergamot Oil
20 Drops Frankincense
20 Drops Lavender Oil
Fill with the desired amount of carrier oil and shake to mix
A BLEND FOR YOUR GUY - TURN YOUR MAN ON TO EO’S
I saw this “Lumber Jack Blend” and couldn’t leave it out! I’m a sucker for all things sandalwood. Have your favorite counterpart use this as his cologne or even as an oil for that beard he’s been sporting. Can’t wait to try this out on my main squeeze!
10 Drops Patchouli
10 Drops Sandalwood
10 Drops Clary Sage
10 Drops Frankincense
Fill with the desired amount of carrier oil and shake to mix
Hope these recipes remedy some of the things that afflict you! We would also love to hear any of your tried and true EO rollerball concoctions!


Breathe Deep with These 3 DIY Lavender Recipes
Aside from smelling heavenly, lavender comes with a slew of amazing benefits. Lavender can help with anxiety, insomnia, restlessness, PMS, antiseptic and a recent study reported in the Journal of Medical Microbiology shows that lavender oil is a potent anti-fungal as well. Take a look around your home. Hand soap, body lotion, countertop cleaner, linen spray, candles…you probably keep some sort of lavender-scented item in your home.
Aside from smelling heavenly, lavender comes with a slew of amazing benefits. Lavender can help with anxiety, insomnia, restlessness, PMS, antiseptic and a recent study reported in the Journal of Medical Microbiology shows that lavender oil is a potent anti-fungal as well. Take a look around your home. Hand soap, body lotion, countertop cleaner, linen spray, candles…you probably keep some sort of lavender-scented item in your home.

I wondered, what else this amazing herb could be used for? It turns out lavender is a gold mine for DIY home products! I’ve chosen three that I think you’ll find come in super handy.
Lush Lavender Bath Scrub

Lavender oil is a choice pick for a bath time scrub! This oil works as an antiseptic to promote healing of the skin. It’s also popular for assisting with sleep. Insomnia may have met its match with this one! So, get ready to settle your senses after a long day.
Here’s what you’ll need to whip up a batch of this delectable and healing scrub:
Mason or apothecary jar
1 1/2 cups of organic sugar
1/4 cup of olive oil
Mix the ingredients together to coat the sugar. Add dried lavender flowers for some extra pizzaz!
Chilled Lavender Towels
Lavender oil’s sedating qualities work well for sleeplessness AND pain relief. Whether you have a headache, fever or you’re white-knuckling it through childbirth--its ability to curb pain really is astonishing! Here is one of my most cherished methods for diminishing discomfort.

How To:
Fill your sink with water and add 6-10 drops of lavender oil
Soak several hand towels in the lavender water (let excess water run off of the towels)
Roll up the towels and put them on a tray in the freezer
Grab a towel from the freezer whenever you are in need. These little bits of magic are nothing short of amazing. Place one across your forehead or unroll it to cover your nose and mouth. Now relax and breathe in the crisp, cool, heavenly aroma for some obligatory tranquility.
Lavender Insect Repellent
My personal favorite! If you’re worried about all of those harsh chemicals in regular bug sprays like I am, you’ll love this one. Plus, it’s super easy! What’s better than an au naturel bug spray smelling of sweet, sweet lavender? Gliding through the woods, free of bug bites and smelling like an angel…Ha! I’m in!

Ingredients & How To:
Fill an 8oz spray bottle halfway with distilled water
Add 30-50 drop of lavender oil
Add witch hazel to fill the remainder of the bottle
Venture to the great outdoors with a new-found freedom from deet…and mosquitos!
Bonus Lavender Quick Tips

Make lavender oil a staple in your stash. You can find it at a health food store, specialty grocery store, or maybe you even have a friend that sells EO’s. It can be used alone, or with a carrier oil. Choose a food-grade oil for lavender lemonade, or pick a lavender oil to keep in your first aid kit for its topical anesthetic properties. Sometimes I’ll even rub a little lavender oil on my hands to give my easily irritated chi, Ren, a belly rub, this miraculously always helps him calm down.
Lavender is a great reminder to stop and take a deep breath on a busy day. Send me a DM with your lavender oil tips and tricks! Bonus points if you can let me in on your favorite lavender oil rollerball blend and its uses. I’d love to feature it in an upcoming post and share it with all of our community!


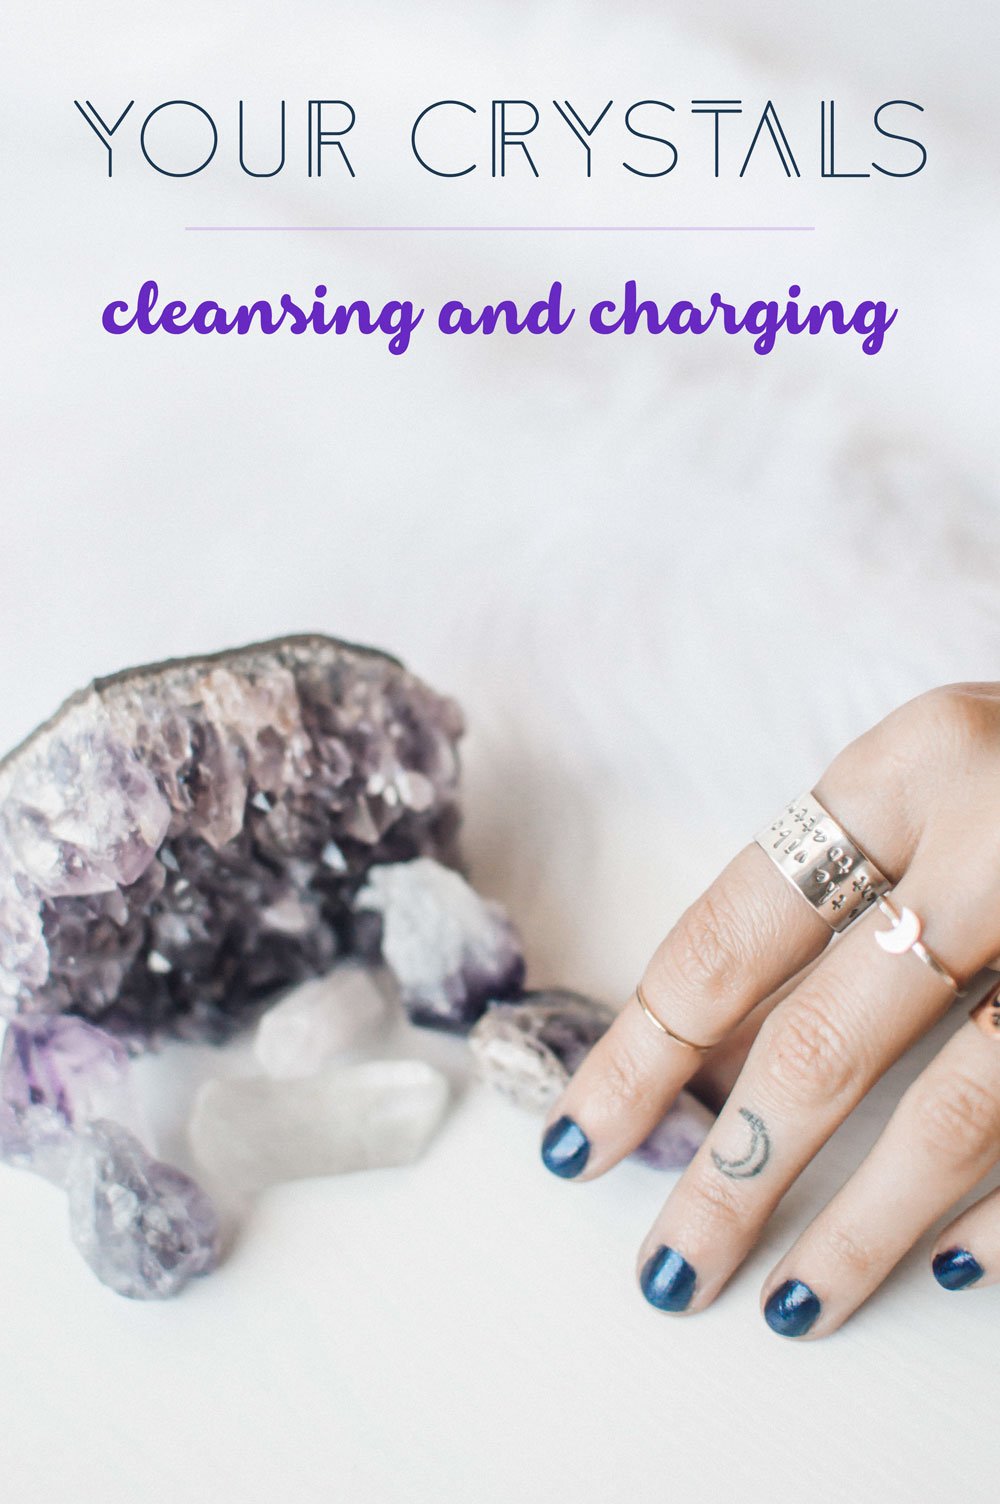
Cleansing & Charging Your Crystals
By now you’ve been putting your crystal collection to good use (I hope you’ve been enjoying using the Metraton's Cube grid!). You’ve undoubtedly realized though, that these sweet little gemstones take on the harshest of vibes! Think of the amethyst you might keep under your pillow to rid yourself of restlessness, or the sunstone you’ve been carrying around to help pull yourself out of a funk. Everything I explain below can be used to clean and clear your crystal jewelry as well.Pinterest_CrystalsHave you considered a way to cleanse your crystals of these negative energies? Like everything that we value in our lives, these precious stones need our TLC.

By now you’ve been putting your crystal collection to good use (I hope you’ve been enjoying using the Metraton's Cube grid!). You’ve undoubtedly realized though, that these sweet little gemstones take on the harshest of vibes! Think of the amethyst you might keep under your pillow to rid yourself of restlessness, or the sunstone you’ve been carrying around to help pull yourself out of a funk. Everything I explain below can be used to clean and clear your crystal jewelry as well.Have you considered a way to cleanse your crystals of these negative energies? Like everything that we value in our lives, these precious stones need our TLC.
Cleansing Your Crystals
Here are two of my favorite ways to cleanse your crystals:
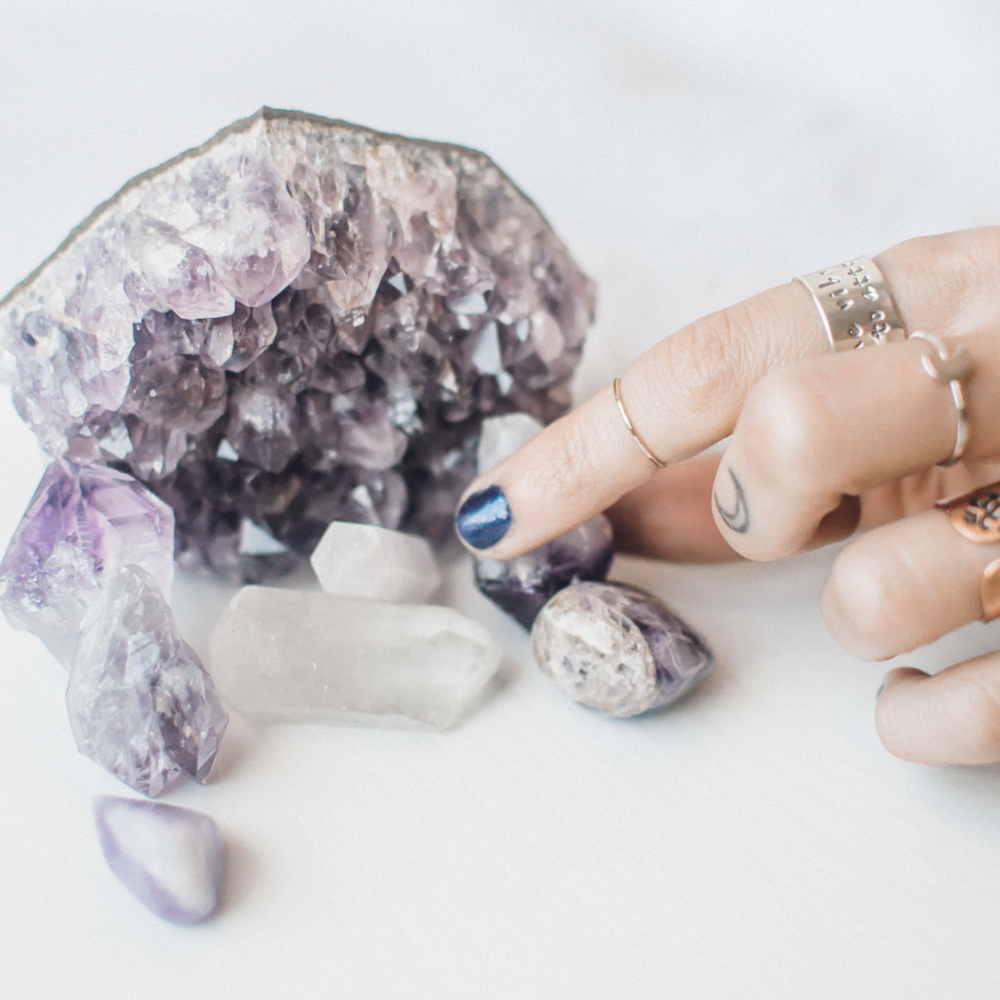
AMETHYST CAVE
I know what you’re thinking, “sure, let me just run out to my backyard and hop in my crystal cave!” Although that would be fun, this type of cave is much more compact. An amethyst cave refers to a cathedral-shaped structure. Geodes and clusters will also work well for this. Just leave your crystals on the amethyst for 24-48 hours.
SMOKE & HERBS
A well-liked method for clearing crystals, I suggest exploring some plants and tools that are related to your ancestral lineage. Some examples of smoke and herbs are:
Lavender
Mugwort
Cedar
Rosemary
If you want to learn how to make DIY herb sticks, check out this blog post.

Charging Your Crystals
Success! Your crystals are now super fresh and ready for charging. Charging is meant to keep your gemstones in tune with you and your personal uses for them. Try to charge them soon after cleansing them so they don’t pick up any of those bad vibes.Just like cleaning, there are several methods for charging your crystals but here are a few:

SUNLIGHT
Light, life, abundance, and vitality. Be careful not to keep your crystals in sunlight for too long as this can cause fading.
MOONLIGHT
Inward fulfillment. Crystals can be left outside under the moonlight for a few hours for charging.
WAXING MOON
If you are hoping to use your crystals for an intention focused on new beginnings then place them under the light of a waxing moon as it is moving towards a full moon.
WANING MOON
If you are looking to decrease something in your life, such as illness, place the crystals under a waning moon as it is moving away from a full moon.
I hope all of this talk about cleansing and charging has been helpful. I sure did learn a lot! There are as many methods of clearing crystals and charging them as there are people.
Please reply and share some of your tried and true personal favorites! For more ways to cleanse and charge your crystals, click here.


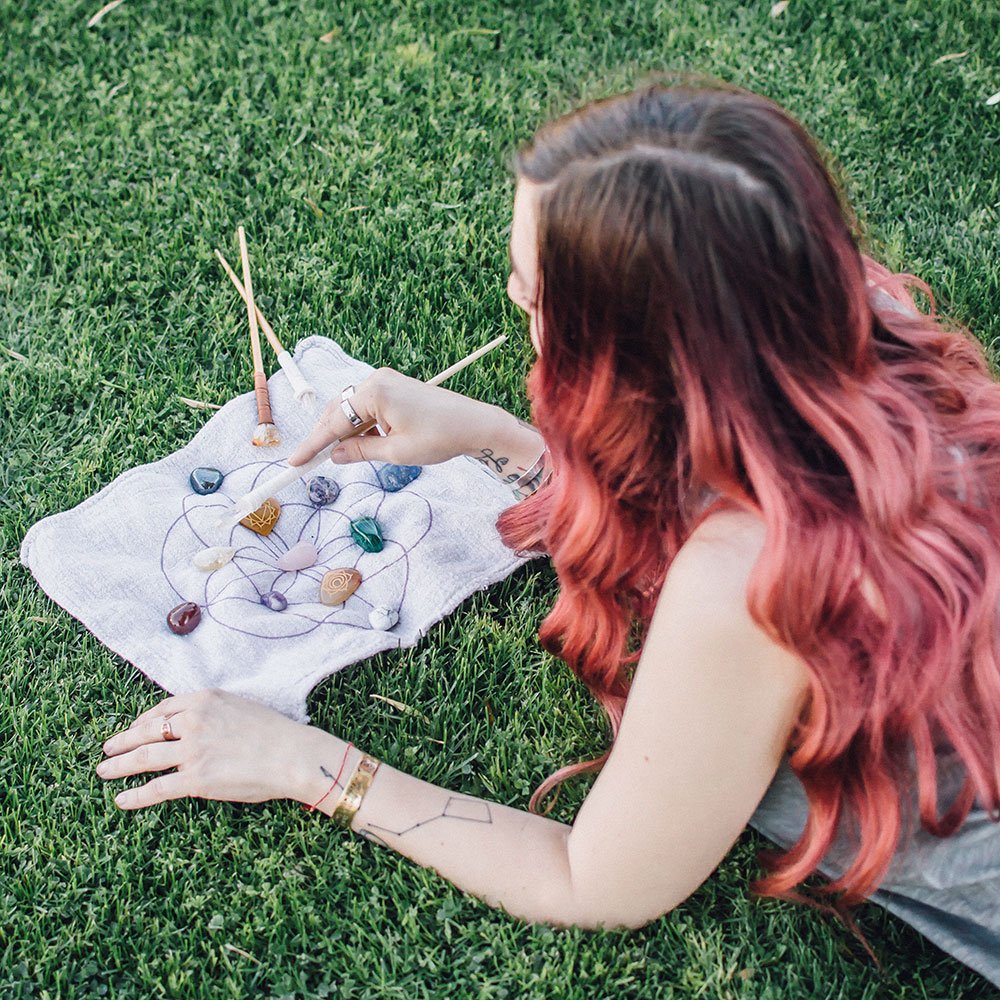
Activating Your Crystal Grid
You’ve set an intention and created a beautiful crystal grid, but now what? Activating your crystal grid is a great way to spend more time with it, reinforce your intention, and bring positive energy into it. We covered the basics of making a crystal grid for reaching your goals on the blog two weeks ago, and today I want to talk a bit about how to carry on with this practice.As a note, crystal wands are beautiful but they’re not a necessity for activating your grid. You can use a point crystal of your choice or even your hand.

You’ve set an intention and created a beautiful crystal grid, but now what? Activating your crystal grid is a great way to spend more time with it, reinforce your intention, and bring positive energy into it. We covered the basics of making a crystal grid for reaching your goals on the blog two weeks ago, and today I want to talk a bit about how to carry on with this practice.As a note, crystal wands are beautiful but they’re not a necessity for activating your grid. You can use a point crystal of your choice or even your hand.
Three Ways to Activate Your Crystal Grid
With all three of these methods, it’s important to center yourself with a few deep breaths and focus your mind on your intention or goal for the crystal grid. You may want to repeat a mantra or visualization throughout the activation process to help reinforce your intention.
THE “CONNECT THE DOTS” METHOD

Start on the outer crystals of your grid with your crystal wand or a pointed crystal, and start drawing lines between the crystals, just like you’d do for a dot-to-dot drawing. Continue working your way closer to the center, drawing invisible lines between all of the crystals. Once you reach the center stone take a moment to close your eyes and imagine the energy of the stones uniting and connecting.
THE “CAKE CUT” METHOD
Starting on the outside of the crystal grid, circle your wand or pointed crystal around the grid in any direction that feels good to you. As you slowly circle the crystals' image, invisible lines of energy begin connecting them. Once you’ve finished this first step, place your wand on your center stone and slowly trace out on the rows of crystals, using the same motion you would cut a cake, until you’ve traced over all of them. Imagine the energy of the crystals uniting and radiating from the center stone.
THE “HAND” METHOD
Start by moving your hand above the stones in a circular motion. Imagine a ray of light connecting all of the crystal and traveling through them. Spend as much time as you’d like on this step, moving your hand over the crystals and visualizing the light. When you feel that the stones are connected, hold your hand over the center stone and feel all of the energy centralizing there.With all of these methods, take a moment to sit with your activation and fully experience and thank the universe for the energy to activate your crystal grid.If you're looking for a crystal grid to start with, download our Metraton's Cube crystal grid here.
